


Sewing School ® 2: Lessons in Machine Sewing; 20 Projects Kids Will Love to Make
160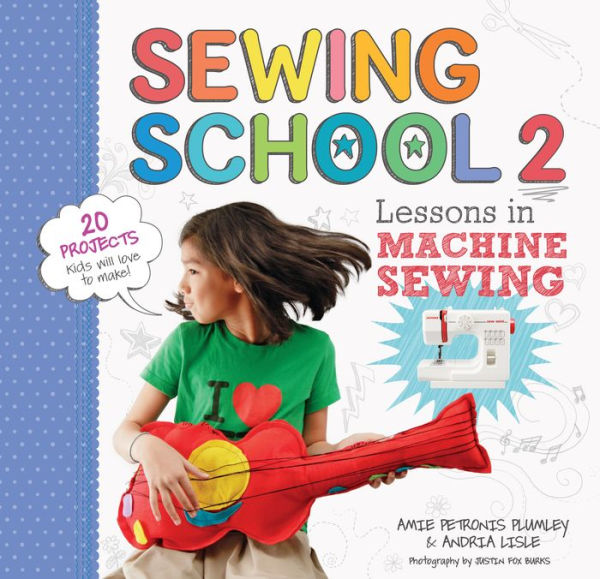
Sewing School ® 2: Lessons in Machine Sewing; 20 Projects Kids Will Love to Make
160eBook
Related collections and offers
Overview
For kids who have mastered hand sewing, machine sewing opens up exciting new possibilities! Sewing School ®2 offers 20 creative projects designed for children ages 7 and up, including cloth pencil cases, purses, wall pockets, and even a fabric guitar. Illustrated step-by-step instructions show kids how to thread a sewing machine, select an appropriate stitch, and choose fabrics and patterns that evoke their own unique style. Suggestions for creative variations open up endless possibilities for kids to imaginatively personalize their fabric creations.
Also available in this series: Sewing School ®,Sewing School ® Fashion Design, Sewing School ® Quilts, and Sewing School ® Box Set.

Product Details
| ISBN-13: | 9781603428965 |
|---|---|
| Publisher: | Storey Books |
| Publication date: | 08/19/2013 |
| Series: | Sewing School |
| Sold by: | Hachette Digital, Inc. |
| Format: | eBook |
| Pages: | 160 |
| File size: | 44 MB |
| Note: | This product may take a few minutes to download. |
| Age Range: | 8 - 12 Years |
About the Author
Andria Lisle is coauthor of Sewing School®, Sewing School 2®, Sewing School Quilts, and Sewing School® Fashion Design. She is Curator of Strategic Engagement at the Memphis Brooks Museum of Art.
Amie Petronis Plumley is coauthor of Sewing School®, Sewing School® 2, Sewing School® Quilts, and Sewing School® Fashion Design. She is an elementary school teacher at Grace-St. Luke’s Episcopal School in Memphis, Tennessee, where she inspires students to sew in the classroom, in an after-school sewing club, and at a wildly popular summer sewing camp.
Read an Excerpt
CHAPTER 1
GETTING STARTED
Welcome to Sewing School 2!
Sewing with a machine looks hard. Sewing with a machine seems magical and a little bit dangerous, too. If you follow the instructions in this book, you can learn how to safely and successfully use a sewing machine.
And once you know how to sew, you can make whatever you want using fabric, thread, and your sewing machine. All of the projects in this book were kid-tested by sewers between the ages 7 and 13.
You might already be familiar with a sewing machine. Maybe your grandmother has one that she uses to make clothes. Maybe your mom or dad has a sewing machine that is stored on a closet shelf or sits on its own table in your family's craft room. Maybe they've let you operate the foot pedal while they guide the fabric under the needle. Or maybe no one else in your family has ever sewed at all. Whether you've inherited a sewing machine, just bought one, or are planning to start sewing soon, this book will help you become a careful, independent sewer. Use the step-by-step pictures and directions included with each project to learn how to safely use a sewing machine without any help from grown-ups.
Before you jump in and start a big sewing project, please read through this entire chapter. It will teach you so much that will make sewing any project easier. It includes twelve lessons that teach the basics of machine sewing, like how to identify the parts of a sewing machine, how to thread a machine and make a bobbin, and how to sew basic machine stitches. You can also refer back to these specific lessons as you make all the projects in this book.
LESSON ONE
How to Use This Book
Sewing School 2 is filled with step-by-step pictures and directions that make it easy to learn how to sew. We've added guides to make sure that everything goes smoothly so you'll have lots of fun. Here is a list of the kinds of guides you'll find with each project.
Ratings
Each project is rated with one, two, or three stars so you will know how easy it is to make. If you are new to using a sewing machine, you can start with one-star projects and work your way up to the three-star projects.
One star means it is an easy project. It is perfect for new sewers. You will use very basic skills to sew just a few pieces of fabric together. You can make a one-star project in about an hour.
Two stars means it is a skill-building project. These projects teach new skills, such as putting in a zipper and working with bigger pieces of fabric. You might want to spend all afternoon or even a few days to finish a two-star project.
Three stars means it is a harder project. These projects feature steps that are meant to challenge you, such as quilting, or adding a layer of batting. Three-star projects have more steps than the other projects and might take days or even a week to sew.
What You Need
This is a list of the fabric and supplies you need to make the project.
Let's Review
This is a short list of the skills you'll need to know to sew the project. If you are unsure about a skill, you can go back and review it before you begin the project.
Make It Yours
All of the projects in this book are very basic. It is up to you to make them special. Here, you'll find a few ideas for putting your own stamp on a project.
A Note for Grown-Ups
This is a message for your parent or another adult who might be helping you sew the project.
Skill Check
With some projects, you'll have the opportunity to learn a new skill. The skill check teaches you all the steps you'll need to know.
LESSON TWO
How to Choose a Sewing Machine
If you don't already have a sewing machine you can use, you'll need to find one. Maybe someone in your family or a friend has a machine you can borrow. If you have to buy a machine, used machines are easy to find.
There are also new machines for sale at very affordable prices. Ask a grown-up to help you find one that fits your budget and is suitable for your needs. Look for a real (not toy) sewing machine that is simple and easy to operate. While there are a lot of cute toy sewing machines available, you will need a real machine to successfully complete the projects in this book. If you're a first-time machine sewer, and you're looking for a small, affordable sewing machine, check out the Janome Sew Mini. We recommend this machine because it is portable and very easy for a kid to use and understand.
Since cabinetmaker Thomas Saint invented the sewing machine in England during the Industrial Revolution, thousands of brands and models have come on the market. Just make sure that your sewing machine has a drop-in bobbin mechanism (not a side-loading bobbin) because it is easier for beginning sewers to operate. Whether you buy a new or used machine, make sure the operating manual is with it. Avoid purchasing a sewing machine without a manual. If you can't find a manual, or just for extra help, you can ask a grown-up to search Google or YouTube for helpful videos that show you how to perform important tasks like loading the bobbin or threading your machine.
What to Look for in a Sewing Machine
* Real machine (not toy)
* Fits your space and budget
* Drop-in bobbin
* Manual available
Anatomy of a Sewing Machine
All sewing machines are a bit different, but they all have the same important parts. Each part plays an important role. Here is an example of a basic sewing machine. You might also need to refer to your manual to locate some of the parts on your particular machine.
Feed dogs – These rough-feeling teeth are located below the presser foot, on the needle plate of your sewing machine. Feed dogs will gently pull the fabric through the machine.
Foot pedal – A sewing machine foot pedal works just like the accelerator of a car. Push down to go fast, and ease up to slow down. Some models of sewing machines also have a speed control. Always take your foot off the pedal and put it flat on the floor before you make adjustments on your sewing machine, such as raising or lowering the needle.
Hand Wheel – Use the hand wheel to slowly operate your sewing machine needle. Turn the wheel toward you to raise or lower the needle.
Needle plate – Located under the sewing machine's presser foot and over the bobbin casing, the needle plate surrounds the point of your needle and the feed dogs. Look closely at the needle plate on most machines, and you'll see a seam guide that will help you keep your seam allowances at the right width. Most needle plates are removable to replace a drop-in bobbin or to clean lint and loose threads from underneath.
Presser foot – This sewing machine part works like an extra pair of fingers that help guide the fabric as it moves under the needle. You can raise and lower the presser foot using a lever on the back of your machine. Many sewing machines come with extra presser foots that can be switched according to the task at hand, like making buttonholes or sewing in a zipper. We recommend that beginning sewers stick with an all-purpose presser foot.
Stitch selector – This control knob on your sewing machine will determine what kind of stitch you might make. On basic sewing machines, you can choose between straight or zigzag stitches. Fancier machines have many more varieties of stitches.
Take-up lever – This arm is a very important part of threading the sewing machine. It moves up and down as the needle moves up and down in and out of your fabric. Use the hand wheel to move the take-up lever to its highest position whenever you're about to thread it. If your thread is clumping and making a mess when you sew, you might have forgotten to guide the thread through the take-up lever.
Tension control – This knob controls the delicate relationship between your sewing thread and your bobbin thread. You should not have to adjust it often. If necessary, refer to your sewing machine manual to make sure that you maintain the perfect tension level — you don't want one thread looser or tighter than the other one. Be very careful when adjusting the tension control. If it gets too unbalanced, you might have to take your sewing machine to a repair shop to get it rebalanced.
Thread guides – These are little locks, levers, and loops that you must direct the thread through on its way from the spool to your machine's needle. Many sewing machines use arrows or numbered or lettered labels to remind you how to guide the thread. Or, refer to your sewing machine manual for exact details.
More Sewing Terms You Need to Know
Bobbin – A sewing machine bobbin is a very small spool of thread that fits inside your sewing machine in a space called the bobbin casing. As you press the foot pedal and the needle flies in and out of the top side of your fabric, the bobbin thread sews the bottom side. Every brand and model of sewing machine uses its own style and size of bobbin, so be sure you've got the correct bobbin for your machine. Keep a supply of extra bobbins in your sewing kit. You will wind thread onto the bobbins yourself, following directions for How to Make a Bobbin.
Bodkin – This is a tool that will help you pull elastic or string through a casing. If you don't have a bodkin, you can use a large safety pin instead.
Pinking shears – These special sewing scissors have saw-tooth blades, which leave a zigzag edge instead of a straight edge. If you don't want to hem a finished project, try using pinking shears instead of regular scissors to cut the edge of the fabric. Pinking shears help reduce the amount of fraying. They can also be used for decoration. Experiment by using pinking shears to cut the open edge of a pocket before you sew it onto your project.
Reinforce stitch – This is a variation on the reverse stitch. You will use the reinforce stitch when you need your stitches to be extra-strong, such as when you attach the handles on projects like the eHold or the Portable Tree Stump or the elastic band on the Art-to-Go-Go.
Reverse stitch – Reversing is what knots your thread, so your stitches can't come undone later on. It's important to reverse stitch when you start sewing a stitch, and to reverse again at the end to "lock" it. Your manual will tell you how to locate the reverse knob or button on your sewing machine.
Stay stitch – A stay stitch is a quick and simple straight stitch that will help keep cotton fabric from fraying too much. You will sew a stay stitch in place of a hem when you make the Snack Time Bag, and on other projects that have pockets.
Stop & start sewing marks – The marks that you make on your fabric when you are going to leave a space to turn your project good side out or stuff it. You will make these marks yourself with chalk. They should be as far apart as the length of your pointer finger.
Straight stitch – This is the most basic stitch you can sew using a machine. Just as it sounds, it looks like a straight line. It's also the stitch you'll use most often. The straight stitch makes perfect seams when you're sewing together two pieces of fabric. It can also be used for hemming, topstitching, or decorating almost-finished projects.
LESSON THREE
In Your Sewing Kit
If you already know how to hand sew, you probably have a sewing kit of your own. Your machine sewing kit will look a lot like a grown-up's sewing kit, with inexpensive tools that you can use over and over again. Be sure to keep all your sewing tools in one place. We recommend using a medium-size box or bag for your very own sewing kit.
Here is a list of the tools and notions you need for your sewing kit. You can find more information about these tools in the Resource Guide in the back of this book.
Sewing Machine Bobbins
Bobbins that are the right size for your sewing machine are key to quick and easy sewing. Wind (see How to Make a Bobbin) one or two with thread so you can just slip in a new bobbin when the bobbin you are using runs out of thread. Keep two or three bobbins empty so you can wind them with specific colors to match or contrast your fabric.
Needles
* Sewing machine needles. Keep a supply of different size needles on hand and use a new needle after about eight hours of sewing on your machine. For normal sewing, we like to use size 14 needles. If you have heavier fabrics like fleece or denim, you might need a larger needle (size 16 or 18). Smaller needles (size 8 or 10) are suitable for lightweight fabrics.
* Hand sewing needles. You'll use these to finish stuffed projects or add trimmings. You can use a Chenille Size 22 Sharp Point Needle and craft thread, especially when you want to show off your hand sewing stitches. Or, when you want to hide your stitches, you might prefer to use a regular sewing needle and the same thread you use on your sewing machine.
Thread
* Machine sewing thread. Start with a spool of white thread and then add spools of other colors as you need them. It's easy to get overwhelmed when you look at all the types of thread available at the fabric store, but all-purpose sewing thread works great for most projects.
* Hand sewing thread. You might want some craft thread or thicker thread so the stitches show and become part of the design.
Scissors
Scissors are a very important part of your sewing kit. You will use them to cut fabric and thread. We recommend the Fiskars Junior scissors. Never cut paper (including sewing patterns) with your sewing scissors because paper will make them dull. Keep another pair of scissors in your sewing kit for cutting out paper patterns. We like to call these scissors "everything else scissors," because you will use them to cut everything but fabric. You might also want to have a pair of pinking shears in your sewing kit. They are special sewing scissors that have sawtooth blades instead of a straight edge.
Chalk and Pencil
Use chalk or a pencil to trace patterns and measurements on fabric. Chalk works great when you need to make a temporary mark on your fabric, because you can rub it off afterward. There are also fabric-marking pencils that you can use to trace patterns and rub off afterward, too.
Ruler or Measuring Tape
A ruler or measuring tape will help you measure exactly where you need to cut and sew. A ruler works best when you're working on a table or on the floor. Use the measuring tape when you need to measure items that are not flat, such as people or toys.
Bodkin or Large Safety Pin
Either of these will be useful when you are pulling elastic or a drawstring through a casing.
Pincushion and Straight Pins
You'll need straight pins (with large, round heads) to pin a pattern to your fabric or to hold two pieces of fabric together while you are sewing. Pins are sharp! Be sure to use a pincushion so you always know where your pins are! To find out how to pin, see here.
Seam Ripper
This small, sharp metal tool will help you undo your sewing machine mistakes. Keep it near your sewing machine. Learn how to correctly use a seam ripper.
Sewing Machine Manual
Many different manufacturers make sewing machines, and while they all basically work the same way, each machine is a little bit different. You will often need to be able to refer to the manual, or guide, for your particular machine. If you can't find the manual for your sewing machine, you might be able to locate a copy online. Or, ask a friend who sews to help write down basic instructions for your machine.
LESSON FOUR
Sewing Machine School Rules
1. Set up your sewing machine in a safe place.
This is very important. You need to find a table or desk with an electrical outlet nearby where you can safely use your machine. If possible, stay out of the way of family traffic. Don't sew at the kitchen table while the grown-ups are trying to cook dinner. Try to keep your work space clean and free of other clutter so you can spread out your sewing project. Make sure you have a lamp nearby or a bright overhead light because it's easy to get frustrated if you can't see exactly what you're doing. Sit in a chair that's the right height so you can easily reach the foot pedal from your seat.
2. Your sewing machine is not a toy!
There is a lot of responsibility that comes with using a real sewing machine. We know it's tempting to stomp on that foot pedal and watch your needle and thread race from one end of the fabric to the other, but that's not safe or smart. You can break your machine doing this, or even worse, hurt yourself or someone else. Do you know what it feels like to accidentally prick your finger with a hand sewing needle? Sewing machine needles are even sharper, and they make quick, tiny stitches that can really hurt your fingers. But, as long as you use your sewing machine correctly, you will be fine. Once you've got your rhythm, it's easy to let your mind wander as you zip from one end of the fabric to the other. Pay attention! You can easily bend or break your sewing machine needle. Don't ever run over a pin, a zipper pull, or anything else that's metal. If you're using pins, pause when the presser foot comes close to the place you've pinned. Take your foot off the pedal. Remove the pin and put it in your pincushion, then resume sewing.
(Continues…)
Excerpted from "Sewing School 2"
by .
Copyright © 2013 Andria Lisle and Amie Petronis Plumley.
Excerpted by permission of Storey Publishing.
All rights reserved. No part of this excerpt may be reproduced or reprinted without permission in writing from the publisher.
Excerpts are provided by Dial-A-Book Inc. solely for the personal use of visitors to this web site.
Table of Contents
A Note to You from the Authors
About this Book: An Introduction for Adults
Getting Started
Welcome to Sewing School 2!
Lesson One: How to Use This Book
Lesson Two: How to Choose a Sewing Machine
Lesson Three: In Your Sewing Kit
Lesson Four: Sewing Machine School Rules
Lesson Five: Finding Out about Fabric
Lesson Six: Patterns
Lesson Seven: Ready, Set, Thread
Lesson Eight: Get Your Machine Stitches On
Lesson Nine: It's Time to Sew
Lesson Ten: Turn the Good Side Out
Lesson Eleven: Stuffing and Topstitching
Lesson Twelve: Bring Your Project to Life
Lesson Thirteen: Pop Quiz
Stitching Sampler
Square Pins Pincushion
Sewing Machine Cozy
In My Room
Secret Message Pillow
Welcome to My Room
Sleepy Bear
Wall Pocket
Stripy Quilt
Let's Go
Cookie Coin Saver
Tag Along
Art-to-Go-Go
Zippy Pouch
eHold
Time to Play
Hip Hip Hooray! Bunting
Quiet Play
Etc. Backpack
Superstar Microphone
Rock On Guitar
The Great Outdoors
Snack Time
Extra Pocket & Belt
Portable Tree Stump
Water Bottle Holder
Patchwork Scarf
Skill Builder 1: Hand Sewing Skills
Skill Builder 2: Oops!
More for Grown-Ups: Sewing with a Group
Find It Yourself: Resource Guide
Index
What People are Saying About This
Sewing School 2seamlessly takes children to the next skill level with the same clear instructions and inspiring photographs as their first book. It's just what follow up books should be, however it's a fine stand alone, too! Learning how to use a sewing machine can be intimidating, but the authors have created the perfect resource for demystifying the process. The directions and projects are not only fresh and enticing, but are presented in a language that's totally accessible to today's young stitching crew. With this book in their hands they'll be ready to make just about anything they dream up!
The lessons, step-by-step photos, and fun kid-friendly (and kid made) projects inSewing School 2are hugely inspiring forbudding crafters. I particularly enjoyed the inclusion of lots of photos of happy children making and using their sewing projects.
I love this book! Presented in a logical and easy to understand format, girls and boys will build confidence and self-esteem while learning to make fun projects with a sewing machine!