


eBookFirst Edition (First Edition)
Related collections and offers
Overview
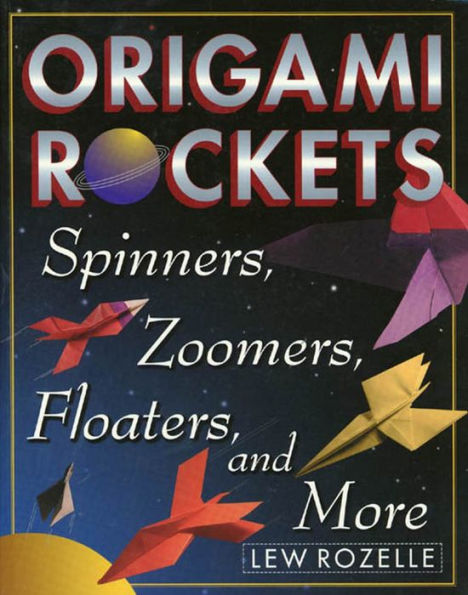
They float! They fly! They zoom! They spin! They even land on their feet! Origami Rockets: Spinners, Zoomers, Floaters, and More presents how to create inflatable paper folding projects that actually take flight. From a few basic designs, this how to do orgami book offers more than fifty unique paper toy rocket creations including:
-Sweptwing rockets
-Landers
-Gliders
-Shortnosed spinner
-And even a lunar lander
With step-by-step instructions on how to fold and inflate rockets into three-dimensional crafts, this origami how to book also features directions on the best methods of throwing their rockets and making them soar. In addition, advanced paper folders will learn how to develop new designs and experiment with making rockets that will go farther, higher, and faster.
No cutting or gluing required! With Origami Rockets, even beginners can create flying machines with only paper and air.

Product Details
| ISBN-13: | 9781429963220 |
|---|---|
| Publisher: | St. Martin's Publishing Group |
| Publication date: | 02/15/1999 |
| Sold by: | Macmillan |
| Format: | eBook |
| Pages: | 192 |
| File size: | 4 MB |
| Age Range: | 9 - 12 Years |
About the Author
Lew Rozelle, a resident of Olympia, Washington, began folding paper at the age of nine and has been designing his own origami models since the 1960s. He is the author of Origami Sailboats and Origami in King Arthur's Court.
Lew Rozelle began folding paper at the age of nine and has been designing his own origami models since the 1960s. He is the author of several books on origami, including Origami Sailboats, Origami Rockets, and Origami Ornaments.
Read an Excerpt
Origami Rockets
Spinners, Zoomers, Floaters, and More
By Lew Rozelle
St. Martin's Press
Copyright © 1999 Lew RozelleAll rights reserved.
ISBN: 978-1-4299-6322-0
CHAPTER 1
Procedures
Valley Fold
Mountain Fold
Fold in Front
Fold Behind
Turn Model Over
Fold and Unfold
Apply Force
Inflate
Sink or Push In
Watch this Spot
Watch this Spot
Hold and Pull
International symbols for folding paper
Reverse Fold
1
Begin with a square folded in half. Push the lower left corner toward the right so that it lies between the front and back flaps.
2
Flatten the model so that the large front and back flaps are together.
3
This procedure is called a reverse fold because a mountain fold–the left edge in this instance–is reversed to become a valley fold.
4
The reverse fold is notated like this.
Waterbomb Base
1
Begin with a square sheet of paper. Valley-fold along the diagonal.
2
Unfold.
The drawings above show how to fold a Waterbomb Base. Begin with a square piece of paper colored side down. Step 1 tells you to valley-fold the paper on the diagonal and shows the direction to make the fold. It is very important when folding the Waterbomb Base to be as precise as you can. The edges of the paper must be lined up exactly. Step 2 shows what the paper looks like when you begin to make the crease. It also tells you to unfold the near flap, returning the paper to its original position.
3
Valley-fold in half on the diagonal.
4
Unfold.
Step 3 tells you to make another valley fold and the direction to fold. Step 4 shows the paper after the fold and tells you to unfold the paper again. In later drawings, these two steps of folding and unfolding are included in one step.
5
Mountain-fold in half.
6
Unfold.
Steps 5 and 6 tell you to make a mountain fold, show the direction of the motion, and show how to unfold the paper. Notice that when you unfold the paper there is no color.
7
Mountain-fold in half.
8
Unfold.
Steps 7 and 8 tell you to make a mountain fold, show the direction of the motion, and show how to unfold the paper. Notice that when you unfold the paper there is no color.
9
Press down on the center of the paper, then pull the ends of the mountain crease down toward the black dot.
10
Continue to pull the ends of the mountain crease down toward the black dot.
Step 9 shows all the folds you have made in steps 1–8 and shows how to pull the left and right edges of the paper downward and together to form a completed Waterbomb Base. Steps 10–12 show this process in progress.
11
Continue to pull the tips of the mountain crease down toward the black dot. Flatten the paper.
12
A completed Waterbomb Base.
Rocket Base
1
Begin with a Waterbomb Base. Valley-fold to the centerline the near left and right folded edges and unfold. Repeat behind.
2
Valley-fold the near right flap to the left along the centerline as if turning the page of a book. Turn over and repeat behind.
3
Valley-fold to the centerline the near left and right folded edges and unfold. Repeat behind.
4
Valley-fold the tip of the near left flap up to the top and unfold.
5
Valley-fold the near left flap so that the crease formed in step 4 lies along the vertical centerline and unfold. Repeat steps 4 and 5 on the three remaining sides.
6
The completed Rocket Base.
CHAPTER 2Rockets
Basic Rocket
1
Begin with a Rocket Base. Valley-fold the near left flap along the existing crease formed in step 5 of the Rocket Base.
2
Pull the long upper edge of the near flap downward. The crease already exists, but it must be turned into a valley fold. At the same time bring the short upper left edge to the vertical centerline. Watch the black dot.
3
The actions of step 2 are shown here in progress. The top of the left edge will be drawn rightward to the centerline. Flatten the model.
4
Valley-fold leftward the right half of the near flap to form a fin. Repeat steps 1-4 on the remaining three sides.
5
!!! CAUTION !!! DON'T POKE YOUR EYE!
6
The completed Basic Rocket
Since the rockets have fins which extend over the holes at their base, a straw may be used to aid in expanding the models. Carefully insert one end of a small straw into the hole in the base of the model and gently blow air into the paper until the model expands. If you blow too hard the model will blow out of shape. You can also inflate the rockets by temporarily bending the fins outward away from your eyes, grasping opposite fins, and blowing into the hole.
Shortnosed Rocket
1
Begin with a Rocket Base. Valley-fold the near left flap so that the crease formed in step 5 of the Rocket Base lies along the vertical centerline.
2
Pull the long upper edge of the near flap downward. The crease already exists, but it must be turned into a valley fold. At the same time bring the short upper left edge to the vertical centerline. Watch the black dot.
3
The actions of step 2 are shown here in progress. The top of the left edge will be drawn rightward to the centerline. Flatten the model.
4
Valley-fold leftward the right half of the near flap to form a fin. Repeat steps 1–4 on the three remaining sides.
5
!!! CAUTION !!! DON'T POKE YOUR EYE!
6
The completed Shortnosed Rocket
Since the rockets have fins which extend over the holes at their base, a straw may be used to aid in expanding the models. Carefully insert one end of a small straw into the hole in the base of the model and gently blow air into the paper until the model expands. If you blow too hard the model will blow out of shape. You can also inflate the rockets by temporarily bending the fins outward away from your eyes, grasping opposite fins, and blowing into the hole.
Longnosed Rocket
1
Begin with a Rocket Base. Valley-fold so that the crease formed in step 1 of the Rocket Base lies along the vertical centerline. The flap will cover the centerline, so you will need to check the alignment of the creases by looking at the far side.
2
Valley-fold the near left corner to the vertical centerline. The bottom of this small crease must touch the bottom of the centerline; it is important that it should not lie any farther to the right.
3
Unfold the small corner.
4
Valley-fold the near left corner so that the crease formed in step 2 lies along the vertical crease. The bottom of this small crease must touch the bottom of the centerline; it is important that it should not lie any farther to the right.
5
Crease very sharply and unfold the small corner.
6
Reverse-fold into the model the near lower left corner, using the crease formed in step 4. The bottom of this reverse fold must touch the bottom of the centerline; it is important that it should not lie any farther to the right.
7
Valley-fold the near flap leftward along the centerline.
8
Valley-fold the bottom of the near flap upward and to the right in a hinge action. Flatten the model.
6
Pull the long upper edge of the near flap downward, forming a new crease along the internal folded edge, while at the same time you bring the shorter left edge to the vertical centerline. Look ahead to steps 10 and 11. Watch the black dot.
10
The actions of step 9 are shown here in progress. Flatten the model.
11
Valley-fold the right half of the near flap leftward over the centerline to form a fin. Repeat steps 1–11 on the three remaining sides of the Rocket Base.
12
!!! CAUTION !!! DON'T POKE YOUR EYE!
13
The completed Longnosed Rocket
Since the rockets have fins which extend over the holes at their base, a straw may be used to aid in expanding the models. Carefully insert one end of a small straw into the hole in the base of the model and gently blow air into the paper until the model expands. If you blow too hard the model will blow out of shape. You can also inflate the rockets by temporarily bending the fins outward away from your eyes, grasping opposite fins, and blowing into the hole.
Supersonic Rocket
1
Begin with a Rocket Base. Valley-fold the near left flap so that the crease formed in step 5 of the Rocket Base lies along the vertical centerline and unfold.
2
Valley-fold so that the crease formed in step 1 of the Rocket Base lies along the vertical centerline. The flap will cover the centerline, so you will need to check the alignment of the creases by looking at the far side.
3
Valley-fold the lower left corner of the near flap: each end of this new valley fold touches the tip of an existing crease. The bottom of this small crease must touch the bottom of the centerline; it is important that it should not lie any farther to the right.
4
Crease very sharply and unfold the corner.
5
Using the crease formed in step 3, reverse-fold into the model the lower left corner of the near flap. The bottom of this reverse fold must touch the bottom of the centerline; it is important that it should not lie any farther to the right.
6
Valley-fold the near flap leftward along the centerline.
7
Lift the entire near flap and flatten it upward and to the right in a hinge action, forming the valley fold automatically.
8
Pull downward the long upper edge of the near flap forming a new valley fold along the internal folded edge; at the same time bring the small left edge to the vertical centerline. Look ahead to the next two drawings, and watch the black dot. Flatten the model.
9
The actions of step 8 are shown here in progress. Flatten the model.
10
Valley-fold the near flap leftward along the centerline to form a fin. Repeat steps 1–10 on the three remaining sides.
11
!!! CAUTION !!! DON'T POKE YOUR EYE!
12
The completed Supersonic Rocket.
Since the rockets have fins which extend over the holes at their base, a straw may be used to aid in expanding the models. Carefully insert one end of a small straw into the hole in the base of the model and gently blow air into the paper until the model expands. If you blow too hard the model will blow out of shape. You can also inflate the rockets by temporarily bending the fins outward away from your eyes, grasping opposite fins, and blowing into the hole.
CHAPTER 3Winged Rockets
Basic Winged Rocket
1
Begin with an uninflated Basic Rocket. Swing the near left fin all the way to the right. Flatten the model.
2
Lift the nearest fin upward as far as it will go. Flatten the model.
3
Valley-fold the near flap back to the left along the centerline.
4
Repeat steps 1–3 on the three remaining sides of the Basic Rocket.
5
!!! CAUTION !!! DON'T POKE YOUR EYE!
Grasp opposite fins and inflate the rocket by blowing into the hole in the bottom.
6
Shortnosed Winged Rocket
1
Begin with an uninflated Shortnosed Rocket. Swing the near left fin all the way over to the right. Flatten the model.
2
Lift the nearest fin up and flatten it to the right as far as it will go.
3
Valley-fold the near flap back to the left along the centerline.
4
Repeat steps 1–3 on each of the remaining three sides.
5
!!! CAUTION !!! DON'T POKE YOUR EYE!
Grasp opposite fins and inflate the rocket by blowing into the hole in the bottom.
6
Longnosed Winged Rocket
\ 1
Begin with an uninflated Longnosed Rocket. Swing the near left fin all the way over to the right. Flatten the model.
2
Lift the nearest fin upward as far as it will go. Flatten the model.
3
Valley-fold the near flap back to the left along the centerline.
4
Repeat steps 1–3 on each of the three remaining sides.
5
!!! CAUTION !!! DON'T POKE YOUR EYE!
Grasp opposite fins and inflate the rocket by blowing into the hole in the bottom.
6
Supersonic Winged Rocket
1
Begin with an uninflated Supersonic Rocket. Swing the near left fin all the way to the right. Flatten the model.
2
Lift the nearest fin upward as far as it will go. Flatten the model.
3
Valley-fold the near flap back to the left along the centerline.
4
Repeat steps 1–3 on the three remaining sides.
5
!!! CAUTION !!! DON'T POKE YOUR EYE!
Grasp opposite fins and inflate the rocket by blowing into the hole in the bottom.
6
CHAPTER 4Sweptwing Rockets
Basic Sweptwing
1
Begin with an uninflated Basic Winged Rocket. Swing the near left wing all the way over to the right. Flatten the model.
2
Valley-fold the top portion of the near wing down as shown. The new crease should be horizontal.
3
Valley-fold the near wing back to the left along the centerline.
4
Repeat steps 1–3 on the three remaining sides.
5
!!! CAUTION !!! DON'T POKE YOUR EYE!
Grasp opposite fins and inflate the rocket by blowing into the hole in the bottom.
6
Shortnosed Sweptwing
1
Begin with an uninflated Shortnosed Winged Rocket. Swing the nearest wing to the right as far as it will go. Flatten the model.
2
Valley-fold the top edge of the nearest flap down to the existing crease.
3
Valley-fold the near flap back to the left along the centerline.
4
Repeat steps 1–3 on the three remaining flaps.
5
!!! CAUTION !!! DON'T POKE YOUR EYE!
Grasp opposite fins and inflate the rocket by blowing into the hole in the bottom.
6
Longnosed Sweptwing
1
Begin with an uninflated Longnosed Winged Rocket. Swing the near left wing all the way over to the right. Flatten the model.
2
Valley-fold the top left edge of the near flap down to the internal folded edge.
3
Valley-fold the near flap back along the centerline.
4
Repeat steps 1–3 on the three remaining flaps.
5
!!! CAUTION !!! DON'T POKE YOUR EYE!
Grasp opposite fins and inflate the rocket by blowing into the hole in the bottom.
6
Supersonic Sweptwing
1
Begin with an uninflated Supersonic Winged Rocket. Fold the near flap over the centerline.
2
Valley-fold the top edge of the near flap down to the internal folded edge.
3
Valley-fold the near flap back along the centerline.
4
Repeat steps 1–3 on the three remaining flaps.
5
!!! CAUTION !!! DON'T POKE YOUR EYE!
Grasp opposite fins and inflate the rocket by blowing into the hole in the bottom.
6
CHAPTER 5Landers
Basic Lander
1
Begin with an uninflated Basic Sweptwing Rocket. Swing the near flap all the way over to the right.
2
Valley-fold the near flap down as shown.
3
Valley-fold the near flap back along the centerline.
4
Repeat steps 1–3 on the three remaining flaps.
5
!!! CAUTION !!! DON'T POKE YOUR EYE!
Grasp opposite fins and inflate the rocket by blowing into the hole in the bottom.
6
Shortnosed Lander
1
Begin with an uninflated Shortnosed Sweptwing Rocket. Swing the near wing all the way over to the right.
2
Valley-fold the near flap down as shown.
3
Valley-fold the near flap back along the centerline.
4
Repeat steps 1–3 on the three remaining flaps.
5
!!! CAUTION !!! DON'T POKE YOUR EYE!
Grasp opposite fins and inflate the rocket by blowing into the hole in the bottom.
6
Longnosed Lander
1
Begin with an uninflated Longnosed Sweptwing Rocket. Swing the near left flap all the way over to the right.
2
Valley-fold the near flap down along its own internal folded edge.
3
Valley-fold the near flap back along the centerline.
4
Repeat steps 1–3 on the three remaining flaps.
5
!!! CAUTION !!! DON'T POKE YOUR EYE!
Grasp opposite fins and inflate the rocket by blowing into the hole in the bottom.
6
Supersonic Lander
1
Begin with an uninflated Supersonic Sweptwing Rocket. Swing the near flap all the way over to the right.
2
Valley-fold the near flap down as shown.
3
Valley-fold the near flap back along the centerline.
4
Repeat steps 1–3 on the three remaining flaps of the rocket.
5
!!! CAUTION !!! DON'T POKE YOUR EYE!
Grasp opposite fins and inflate the rocket by blowing into the hole in the bottom.
6
(Continues...)
Excerpted from Origami Rockets by Lew Rozelle. Copyright © 1999 Lew Rozelle. Excerpted by permission of St. Martin's Press.
All rights reserved. No part of this excerpt may be reproduced or reprinted without permission in writing from the publisher.
Excerpts are provided by Dial-A-Book Inc. solely for the personal use of visitors to this web site.
Table of Contents
Contents
Title Page,Introduction,
Procedures,
Rockets,
Winged Rockets,
Sweptwing Rockets,
Landers,
Zoomers,
Floaters,
Gliders,
Sweptwing Gliders,
Zoomer Gliders,
Soarers,
Three-Fin Rockets,
Composite Rockets,
Rocket Design and Flying,
Copyright Page,