
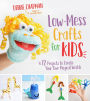

Low-Mess Crafts for Kids: 72 Projects to Create Your Own Magical Worlds
192
Low-Mess Crafts for Kids: 72 Projects to Create Your Own Magical Worlds
192Paperback
-
PICK UP IN STORECheck Availability at Nearby Stores
Available within 2 business hours
Related collections and offers
Overview
When craft time rolls around, parents usually cringe at the thought of a creativity storm’s aftermath. Glue, glitter, globs of paint—it all adds up to Mom and Dad assisting (let’s be honest, doing everything) with cleanup. But Debbie Chapman—the supermom behind One Little Project —keeps that freshly cleaned kitchen table in mind with tips to keep these tutorials as mess-free as possible. With tricks like twisting pipe cleaners into fun shapes to avoid glue and using brightly colored cups and patterned paper to avoid paint, Debbie shows that keeping it simple doesn’t mean play time has to be less fun.
Low-Mess Crafts for Kids brings parents and caretakers solutions to the craft time conundrum. As well as being low-mess, all 72 of these awesome projects feature everyday items like pipe cleaners, pom poms and clothespins, which make playtime a cinch. And with step-by-step pictures, kids of any age can create something they can be proud of.
Watch as little ones create their own enchanting worlds—whether they want to explore outer space with a Paper Plate Flying Saucer, race cars on a Poster Board Road Track, or create a whimsical fairy city with Paper Roll Fairy Houses, each craft promises to spark your child’s imagination while leaving you stress free and ready to play along.

Product Details
| ISBN-13: | 9781624145582 |
|---|---|
| Publisher: | Page Street Publishing |
| Publication date: | 06/26/2018 |
| Pages: | 192 |
| Sales rank: | 482,943 |
| Product dimensions: | 8.00(w) x 9.00(h) x 0.40(d) |
| Age Range: | 8 - 12 Years |
About the Author
Read an Excerpt
CHAPTER 1
My Secret GARDEN
Create a family of your own magical flower fairies to live in this special secret garden, created all by you! In this chapter you'll find glowing fairy houses (here), sparkling dragonflies (here) and enchanted toadstools (here). Don't forget the most important part — the secret door that leads from our world into your new mystical garden!
LOW-MESS TIP: KEEP IT SIMPLE
Choosing crafts that use very few materials is the easiest way to keep an activity low-mess. After all, the less you take out, the less you'll have to put away when you're done!
Most of the crafts in this chapter only use a handful of materials, which makes it easy to tidy them up when you're done! This is especially true for the Folded Paper Butterflies — you'll only need 3 things to make those! It's amazing what you can create with just a few simple supplies!
Paper Roll Fairy House, Pipe Cleaner Flower Fairy, Simple Paper Daisies, Craft Stick Fairy Door, Sparkly Pom Pom Dragonflies, Folded Paper Pine Trees, Folded Paper Butterflies, Painted Rock Toadstools
Paper Roll Fairy House
LEVEL OF DIFFICULTY 3/5 * PARENTAL SUPERVISION-ASK A GROWN UP TO HELP WITH THE GLUE GUN.
SUPERVISION–ASK A GROWN UP TO HELP WITH THE GLUE GUN.
THE BEST PART ABOUT THESE FAIRY HOUSES is that you can make them any color you like — and I definitely recommend trying lots of colors. But forget about pulling out lots of messy paint colors — just use colored paper instead! You'll end up with a brightly colored fairy village and the only thing you'll be left with is a few scraps of paper. (I like to save those scraps for future creations!)
OUT OF EVERY CRAFT IN THIS BOOK, these were my daughters' favorite! They spent hours playing with their little fairy village. They absolutely loved that the light from the tea lights makes the windows light up. Most battery operated tea lights flicker a little, so it's fun to imagine a tiny little fairy fluttering around inside!
MATERIALS
STEP 1: Cut out a rectangle (about 6 × 4½ inches [15 × 11.5 cm] in size) from one of the pieces of colored paper. Draw 3 circles onto the paper for your fairy house windows. To make perfect circles, trace around the bottom of a glue stick.
STEP 2: Carefully use the point of the scissors to poke a hole in the middle of each circle, then cut out the window holes. Cut out squares of white printer paper, just slightly larger than the window holes. Place a paper square so that it covers each window and tape it in place.
STEP 3: Flip the paper rectangle back to the front and use washable markers to decorate your fairy house with flowers and vines. Press a small rhinestone sticker onto the center of each flower.
STEP 4: Roll the paper rectangle into a tube shape. Place a piece of tape on the inside of the tube to hold it in place. Squeeze a line of hot glue along the edge of the colored paper, then carefully pinch it closed.
STEP 5: Using a pencil, trace around the edge of a large round plate on the other piece of colored paper, then cut out the circle with your scissors. Cut out a one-third wedge (as if you were cutting a piece of pie) from the circle.
STEP 6: Roll the wedge of paper around itself to make a cone shape. The bottom of the cone should be just larger than the paper tube you just made. Place a piece of tape on the inside of the cone to hold it together while you glue. Run a line of hot glue close to the edge of the paper and pinch it closed.
STEP 7: Cut a fringe around the bottom edge of the cone by snipping ½inch (1.3-cm) cuts around the entire edge, straight up towards the point of the cone.
STEP 8: Squeeze a line of hot glue around the top edge of the paper tube. Gently press the cone roof onto the house, making sure the seams line up at the back.
STEP 9: Using a black washable marker, draw straight dashed lines, all the way around, from the point of the cone down towards the fringe.
Turn on your battery operated tea light and place your paper roll house on top of it. Turn off the lights and watch the windows glow!
Your paper roll fairy house is complete!
Pipe Cleaner Flower Fairy
LEVEL OF DIFFICULTY 5/5 * PARENTAL SUPERVISION NOT REQUIRED.
IT REALLY IS AMAZING what you can make when you add fabric flowers to your stash of craft supplies. These flower fairies are beautiful and they are really simple to make. And best of all, when you're all finished, you'll only be left with one small pipe cleaner scrap. What an easy clean up!
I'M NOT THE BEST when it comes to drawing, so faces always make me a little nervous. But my best advice is just to keep the faces simple. Don't try to make the face complicated and don't add too many features. Little circles for eyes and a little curve for the mouth are all you need to make a happy and adorable face.
MATERIALS
STEP 1: Remove the plastic end piece that holds together the fabric flower. Slide the large flower piece onto the craft stick. Use scissors to cut a slightly larger opening in the middle of the flowers, if needed, to make it fit.
STEP 2: Fold the light brown pipe cleaner in half to find the middle. Open it back up and place the middle of the pipe cleaner behind the craft stick. Take the left end of the pipe cleaner and wrap it around all the way to the right. Take the right end of the pipe cleaner and wrap it around all the way to the left. Twist, then bring each end back to the middle.
STEP 3: Bend the pipe cleaner forward near the end on each side to make hands and bend it forward again near the middles to make elbows.
Wind one of the pink pipe cleaners around the craft stick over and around the brown pipe cleaner to hold the arms in place. Then wind it tightly around the craft stick below the arms to make the fairy's waist.
STEP 4: Fold the second pink pipe cleaner in half. Fold each end back to the center fold to make a "W" shape. Pinch the folds closed to make two fairy legs. Bend up the ends of the legs to make feet.
STEP 5: Place the fairy legs under the fabric flower. Starting about 1 inch (2.5 cm) above the fairy's feet, wind the third pink pipe cleaner tightly around the legs and the craft stick to hold it in place. Keep winding upwards, towards the fabric flower, until you run out of pipe cleaner.
STEP 6: Using washable markers, draw a simple face on the wooden bead. Push the wooden bead onto the top of the craft stick.
STEP 7: Squeeze a small line of white glue around the opening at the top of the wooden bead. Insert the center part of the fabric flower into the top of the wooden bead and gently press it against the glue to hold it in place. Allow the glue to dry.
STEP 8: To make the fairy wings, follow Step 1 to Step 5 of the Sparkly Pom Pom Dragonflies using the 2 sparkly pipe cleaners. Shape them into fairy wings by gently opening each pipe cleaner loop.
STEP 9: Squeeze a small glob of glue onto the back of the fairy behind the arms. Gently press the fairy wings onto the white glue. Allow the glue to dry.
STEP 10: Your pipe cleaner flower fairy is complete!
HINT: Paint pens and permanent markers will bleed if you use them on a wooden bead. If you have trouble with your ink bleeding, use your finger to add a thin layer of white glue to the wooden bead and allow it to dry before you draw the face.
Simple Paper Daisies
LEVEL OF DIFFICULTY 4/5 * PARENTAL SUPERVISION NOT REQUIRED
I ABSOLUTELY LOVE FLOWER CRAFTS. I live in Canada, so by the end of winter I'm usually so excited for the warm weather to come that I end up crafting all sorts of flowers while I wait for my spring bulbs to bloom. Especially if there's still snow on the ground!
THESE DAISY SHAPED FLOWERS LOOK SO BEAUTIFUL. They use only a handful of supplies and leave almost no scraps behind when you're done. In fact, these flowers are an awesome way to use up leftover paper scraps from other creations you've made.
MATERIALS
STEP 1: Cut 16 strips of paper, approximately ? × 3 inches (1 × 7.5 cm) long. Using a glue stick, glue the ends of the paper strips together to make petals (don't fold the ends). If you've used heavier paper, you might need white glue or a hot glue gun to keep them from popping open.
STEP 2: Place a large rhinestone sticker with the sticky side facing up on a flat surface. Press the end of one of the petals onto the sticky part of the rhinestone so the curved end points straight outwards.
STEP 3: Add 3 more petals to the back of the rhinestone sticker to make an X shape.
STEP 4: Add 4 more petals to the back of the rhinestone, spacing them evenly between the petals you've already added. If the sticky part of the rhinestone is covered, use a glue stick to keep them in place. If you're using heavier paper, use white glue or a hot glue gun to keep them in place.
STEP 5: Glue on the remaining 8 petals to fill in the gaps. Turn the flower right side up. Gently bend each of the petals slightly upwards around the rhinestone.
STEP 6: Using white glue or a glue gun, attach the green craft stick to the back of the flower. Allow it to dry.
STEP 7: Cross the ends of the green pipe cleaner slightly and twist the ends around themselves to make a circle shape.
STEP 8: Bring the opposite sides of the circle together and pinch the ends to fold them.
STEP 9: Slide the craft stick through the middle of the pipe cleaner. Twist the pipe cleaner tightly on both sides of the craft stick to hold it in place. Gently pull apart the folded pipe cleaner to make a leaf shape on both sides of the popsicle stick. Bend the leaves upwards slightly towards the flower.
STEP 10: Your simple paper flower is complete!
HINT: If you're making this craft with younger kids, you can make it quick and easy by using fewer strips of paper and making them wide instead of thin.
Craft Stick Fairy Door
LEVEL OF DIFFICULTY 2/5 * PARENTAL SUPERVISION ASK A GROWN UP TO HELP WITH CUTTING THE CRAFT STICKS.
THERE'S NOTHING MORE MAGICAL than imagining your very own bedroom somehow connecting with another world. And every secret garden needs to have a door! My daughters like to lean their fairy doors against the wall in their bedroom and pretend that the fairies can come through them.
KEEP THE MESS DOWN by using colored craft sticks instead of painting them. You can make your door any color of the rainbow and you can even adjust the shape. Maybe yours will be curved on top? Or square? Or maybe it's so rickety that it's nearly falling apart? Just make sure you remember to find something extra special in your craft stash to use as the door knob.
MATERIALS
STEP 1: Using a sharp pair of scissors, carefully cut one of the craft sticks in half.
STEP 2: Cut a second craft stick at an angle so that it is approximately 3½ inches (9 cm) long at the longest point.
STEP 3: Place 6 craft sticks side by side on a flat and even surface, lining up the top and bottom edges so they are even.
STEP 4 Squeeze a line of white glue along one side of the craft stick halves and gently press it onto the 6 lined up craft sticks, about ½ inch (1.3 cm) from the top.
STEP 5 Squeeze a line of white glue along one side of the craft stick that was cut on an angle and gently press it onto the 6 lined up craft sticks at an angle. Finally, squeeze a line of white glue along one side of the other craft stick half and gently press it onto the 6 lined up craft sticks, about ½ inch (1.3 cm) from the bottom.
STEP 6: Squeeze a small glob of glue onto the back of a button. Gently press the button onto the craft stick door to make a door knob. Allow the glue to dry.
STEP 7: Your craft stick fairy door is complete!
Sparkly Pom Pom Dragonflies
LEVEL OF DIFFICULTY 3/5 * PARENTAL SUPERVISION ASK A GROWNUP TO HELP WITH THE GLUE GUN.
HAVE YOU EVER SEEN A REAL DRAGONFLY fluttering over a pond? They are usually shimmery green, blue or red, and they really do sparkle! These dragonflies remind me of the ones I used to see in my backyard when I was a kid.
FORGET ABOUT USING GLITTER FOR THIS ONE, just use materials that sparkle and shine all on their own! Try using sticker rhinestones, or sparkly foam circle stickers to bring your dragonflies to life. You can clip these sparkly little creatures onto your books, your backpack or even onto your clothes. Then watch them shimmer in the sunlight, just like real dragonflies!
MATERIALS
STEP 1: Keep one pipe cleaner at its full length. Trim off approximately 2½ inches (6.5 cm) from the second pipe cleaner.
STEP 2: Take the ends of one of the pipe cleaners and cross them slightly.
STEP 3: Twist the ends to make a circle shape. Repeat for both pipe cleaners.
STEP 4: Bring the opposite ends of the pipe cleaner circle together until they meet in the middle. Twist it a couple of times. Repeat for the second pipe cleaner circle.
STEP 5: Bend the wings slightly towards one side to finish the wings.
STEP 6: Attach the googly eyes to the large pom pom using crafter's tape.
STEP 7: Add a small glob of hot glue to the end of the clothespin and carefully press the large pom pom onto the glue with the eyes pointing towards the front.
STEP 8: Add a small glob of hot glue just behind the large pom pom and attach the large set of wings so that the wings point towards the front. Add a small glob of hot glue right on top of the middle of the large wings and attach the small set of wings so that the small wings point towards the back.
STEP 9: Add a small glob of hot glue as close to the wings as possible and attach one of the medium pom poms. Continue gluing the medium pom poms onto the clothespin using hot glue until you reach the end of the clothespin.
STEP 10: Your sparkly pom pom dragonfly is complete!
Folded Paper Pine Trees
LEVEL OF DIFFICULTY 3/5 * PARENTAL SUPERVISION NOT REQUIRED.
I'VE ALWAYS WANTED to be able to make those fancy little paper ballerinas. The ones that you make out of folded paper so that when you unfold them you have an amazing garland of ballerinas that look like they are holding hands. But, every time I try to make them, I end up with 4 or 5 ballerinas that are completely unattached. So these trees are perfect and so much simpler, since the idea is to make 4 identical, but completely unattached tree shapes.
THIS IS AN EASY CRAFT TO KEEP TIDY. Just remember to only pull out one sheet of construction paper at a time and make sure you use a glue stick and tape instead of liquid glue to hold your creation together. Besides being low-mess, you don't have to wait for anything to dry!
MATERIALS
STEP 1: Fold the construction paper in half along the long edge. Open up the paper, then bring one of the long edges to the center. Press along the edge to create a fold.
STEP 2: Bring the other long edge to the center and create a fold.
STEP 3: Fold the paper in half to make a long, thin rectangle.
STEP 4: Fold the long rectangle in half one last time to make a shorter rectangle. Using a pencil, draw the shape of half a pine tree. Make sure the middle of the tree is along the side with 4 folded edges. Keeping the paper folded, carefully cut out the tree shape along the pencil line.
STEP 5: You'll end up with 4 identical tree shapes.
STEP 6: Fold one of the tree shapes in half, then use a glue stick to apply glue to the top surface.
STEP 7: Line up the second tree shape over the top of the surface with the glue, and press the pieces together so that the branches line up. Add more glue with the glue stick and attach the third and fourth tree shapes following the same method.
STEP 8: Place the toothpick in the center fold, leaving about 1/2 inch (1.3 cm) coming out at the bottom. Hold it in place with a piece of tape. Use a glue stick to apply glue to the entire open surface of the tree. Carefully line up the branches of the tree and pinch it closed.
STEP 9: Carefully press the toothpick into the end of the wine cork. If you're having trouble getting the toothpick into the wine cork, try using a small screw and a screwdriver to make a hole first.
STEP 10: Your folded paper pine tree is complete!
HINT: If you have the time and patience, I recommend cutting out even more than 4 tree shapes because the more pieces you glue into your tree, the cooler it will end up looking!
(Continues…)
Excerpted from "Low-Mess Crafts for KIDS"
by .
Copyright © 2018 Debbie Chapman.
Excerpted by permission of Page Street Publishing Co..
All rights reserved. No part of this excerpt may be reproduced or reprinted without permission in writing from the publisher.
Excerpts are provided by Dial-A-Book Inc. solely for the personal use of visitors to this web site.
Table of Contents
Introduction 9
Building up your Craft Stash 10
Glue Guns and Kids: A Note to Grownups… 13
My Secret Garden
Paper Roll Fairy House 16
Pipe Cleaner Flower Fairy 18
Simple Paper Daisies 20
Craft Stick Fairy Door 22
Sparkly Pom Pom Dragonflies 24
Folded Paper Pine Trees 26
Folded Paper Butterflies 28
Painted Rock Toadstools 30
Under The Sea
Paper Roll Octopus 34
Clothespin Shark 36
Plastic Spoon Mermaid 38
Folded Ribbon Fish 40
Coral Reef with DIY Crystals 42
Plastic Cup Whale 44
Cupcake Liner Jelly Fish 46
Painted Rock Sea Turtle 48
Summer at The Beach
Cork Sail Boat 52
Beaded Pipe Cleaner People 54
Tissue Paper Beach Umbrella 56
Glass Bead Crabs 58
Washi Tape Beach Bag 60
Straw Weaving Beach Towel 62
Craft Foam Surfboard 64
Painted Sea Shell Clams 66
Animals at The Zoo
Paper Roll Lion 70
Foam Cup Zebra 72
Pipe Cleaner Monkey 74
Pipe Cleaner Flamingo 76
Paper Roll Elephant 78
Paper Roll Giraffe 80
Mini Paper Penguins 82
Folded Paper Peacock 84
Little Monsters Puppet Show
Wiggly Worm Puppet 88
Fuzzy Friend Sock Puppet 90
Simple Folded Paper Puppets 92
Pom Pom Hand Puppets 94
Winter Glove Monster Puppet 96
Rubber Glove Dragon Puppet 98
Dancing Ostrich Marionette 100
Pipe Cleaner Finger Puppets 102
On the Road
Paper Roll Cars 106
Candy Box Traffic Lights 108
Tissue Box Fire Truck 110
Shampoo Bottle Gas Station 112
2D Wheelie Police Cars 114
Simple Paper Street Signs 116
Poster Board Road Track 118
Snowy Mountain Cardboard Tunnel 120
Exploring Outer Space
Paper Roll Rocket Ship 124
Peg Doll Astronauts 126
Plastic Bottle Alien 128
Paper Plate Flying Saucer 130
Planet Sun Catchers 132
Glittering Space Rocks 134
Upcycled CD Saturn Model 136
Sparkly Star Mobile 138
Let's Go Camping
Tissue Paper Campfire 142
Beaded Pipe Cleaner Snake 144
Craft Stick Camping Family 146
Craft Stick Tent 148
Paper Roll Frog 150
Craft Stick Picnic Table 152
Easy Paper Cone Trees 154
Simple Quilled Ladybug 156
Fairy Tale Dress Up
Pipe Cleaner Crown 160
Magic Potion Bottle 162
Glittery Magic Wand 164
Woodland Creature Hairbands 166
Jewelled Ribbon Necklace 168
Sparkly Unicorn Horn Hat 170
Glimmering Cardboard Magic Mirror 172
Flower Wreath Headband 174
List of Supplies for Each Chapter
Supplies for Chapter 1 My Secret Garden 176
Supplies for Chapter 2 Under the Sea 176
Supplies for Chapter 3 Summer at the Beach 176
Supplies for Chapter 4 Animals at the Zoo 177
Supplies for Chapter 5 Little Monsters Puppet Show 177
Supplies for Chapter 6 On the Road 178
Supplies for Chapter 7 Exploring Outer Space 178
Supplies for Chapter 8 Let's Go Camping 179
Supplies for Chapter 9 Fairy Tale Dress Up 179
Acknowledgments 181
About the Author 183
Index 184
")
")
")
")

 (The Baby-Sitters Club Graphix Series #3)")
 (The Baby-Sitters Club Graphix Series #4)")


 (The Baby-Sitters Club Graphix Series #2)")
")

")
")
")