


Knitted Socks East and West: 30 Designs Inspired by Japanese Stitch Patterns
144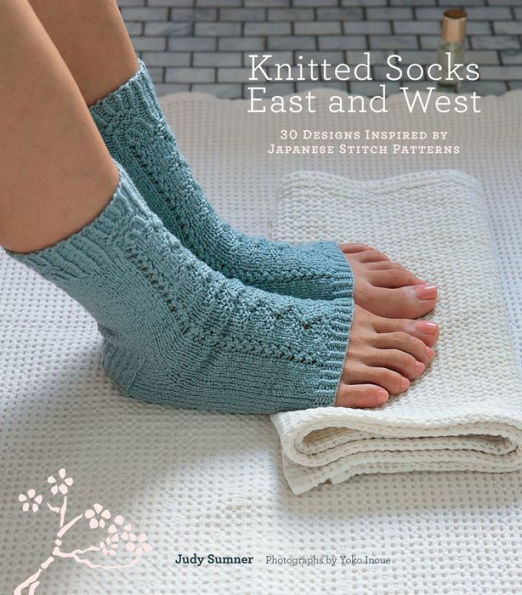
Knitted Socks East and West: 30 Designs Inspired by Japanese Stitch Patterns
144eBook
Available on Compatible NOOK devices, the free NOOK App and in My Digital Library.
Related collections and offers
Overview
In Knitted Socks East and West, author Judy Sumner compares knitting a sock to writing a haiku: both challenge you to create something beautiful and original within a sparse, strict format. In this, her first book, she recounts how she came to study hundreds of exquisite Japanese stitch patters and then apply her new knowledge to the sock designs showcased here.
Whether short or long, fine or bulky, simple or complex, each of the 30 designs in Knitted Socks East and West is named after an intriguing aspect of Japanese culture. For example, the leg of the Origami crew socks appears to fold in and out; the Sumo slipper socks are named after the heavy, organic movement of the cables in their thick yarn; and the Ikebana knee socks highlight a textural floral design. Step-by-step text and easy-to-read charts are included for each design, along with illustrated directions for the Japanese stitchwork introduced in the projects.

Product Details
| ISBN-13: | 9781453268117 |
|---|---|
| Publisher: | ABRAMS, Inc. |
| Publication date: | 04/01/2022 |
| Sold by: | Barnes & Noble |
| Format: | eBook |
| Pages: | 144 |
| Sales rank: | 546,244 |
| File size: | 55 MB |
| Note: | This product may take a few minutes to download. |
About the Author
Read an Excerpt
Knitted Socks East and West
30 Designs Inspired by Japanese Stitch Patterns
By Judy Sumner, Yoko Inoue, Melanie Falick
ABRAMS
Copyright © 2009 Judy SumnerAll rights reserved.
ISBN: 978-1-4532-6811-7
CHAPTER 1
japanese stitch techniques
As you work through the patterns in this book, you may be surprised to discover how similar many of the techniques are to ones you already know. Twisted stitches, lace stitches, cables, and bobbles are found in Japanese knitting as readily as Western knitting, but often are executed with a particularly Japanese twist.
In addition, you'll find—as I did—a handful of stitches that are brand new, such as the pkok, wraps, three-stitch lift, and a variation on the twisted stitch. In this section, I explain these new stitches and lead you through them step by step.
East Meets West
Many of the techniques used in Japanese stitch patterns are ones Western knitters are familiar with already. For example, many of us have worked the classic feather and fan or old shale patterns, consisting of regular repeats of lacy scallops, constructed with a pattern of increases and decreases. Among the Japanese stitch patterns, I found new variations of this longtime favorite. Two of them are included in the Japanese Fan Tabi (page 57) and Kaiso (page 113) sock patterns.
I also found a lot of twisted stitches used in these patterns—single stitches knitted through the back as well as two stitches twisted together and moving to the right or left. These sorts of stitches are also used in many other places familiar to Western knitters, especially German and Bavarian stitch designs. Somehow, though, the Japanese manage to set them apart by adding a touch of something else—a bit of lace, for example, as in the Biwa socks (page 105).
The Japanese patterns contain a lot of lace, and they often have a floral theme or reflect nature in some way. Some of these patterns can be very complex, but even the simpler ones are quite impressive when worked. For example, the Kimono Lace socks (page 109) mostly consist of a simple pattern of yarnovers and decreases, typical of lace. But a cablelike stitch also appears regularly, adding rhythm and interest. Simpler sock designs—those that consist of basic knit and purl stitches—will often have a few yarn-overs and decreases tossed in as well, making the finished effect extraordinary (see Ninja [page 31] and Tatami [page 117]). As in Western knitting, there are cables, but they are often mixed with something I refer to as garter lace—rows of garter stitch separated by rows of yarnovers and decreases that add a decorative touch (see Kyoto Cable [page 97] and Biwa [page 105]).
And finally, there are bobbles. In Japanese patterns, these tricky little bumps pop up in unexpected places. In my Japanese pattern books, many different methods for making bobbles were used. For example, in one version, five stitches were increased from one, then worked for several rows and decreased, resulting in a very "fat" bobble. Another version used a crochet hook to chain five stitches, which were then joined to the original stitch with a slip stitch.
For simplicity's sake, I have written these sock patterns using my own favorite bobble technique: knit in the front, back, front, back, and front of one stitch, then pass four stitches over the stitch on the left. You'll find bobbles in Ikebana (page 35), Karatsu (page 81), and Karaoke (page 125).
Uniquely Japanese
Despite the similarities to Western knitting patterns, however, the Japanese stitch patterns incorporate a few techniques that were brand new to me, and perhaps will be to you, too. Once I deciphered them, I named them pkok (fondly referred to as "peacocks"), wrap, three-stitch lift, and the twist/slip stitch, for the purposes of this book. Illustrated instructions for these techniques appear on pages 12-15.
Pkok
When I saw this stitch in the Japanese stitch dictionaries, I thought it looked like a lacy chain. I found several variations in my Japanese books, but for all of the socks shown in this book, I used this basic one, which is made over three stitches:
Step 1: Using your right-hand needle, pick up the third stitch on the left-hand needle, pass it over the first two stitches, and let it drop off the needle (A).
Step 2: Knit a stitch, yarnover, knit a stitch. This is done every fourth row/round, and the three stitches are worked in Stockinette stitch on intervening rows/rounds (B and C).
I have seen wrapped stitches used in knitting patterns in the past, but never to this degree. Stitches may be wrapped as few as two times and as many as five. And each time, you might wrap anywhere from three stitches to fourteen!
Step 1: Place the stitches to be wrapped (your pattern will tell you how many) on a short cable or double-pointed needle (A).
Step 2: Wrap your yarn around these stitches in a counterclockwise direction, using the number of wraps called for in the pattern (B).
Step 3: Knit the stitches (or work as indicated in pattern) off the cable or double-pointed needle, and continue the pattern (C).
Twist/Slip Stitch
The twist/slip maneuver (TSL and TSR) is very similar to the familiar method of twisting two stitches together and knitting them so the front stitch leans to the right or left, usually abbreviated as LT or RT. However, in this case, only one of the stitches is actually knitted; the other is slipped. The result, much like the LT or RT, is a stitch that moves to the right or the left.
The TSR (above left) is worked by beginning as you would with RT. Insert the right-hand needle into two stitches on the left-hand needle as if to knit them together (A). Then pull the yarn only through the first stitch (B) and allow the second stitch to just slip to the right-hand needle without knitting it (C). The slipped stitch is knit on the second round, creating an elongated stitch that clearly leans to the right.
The TSL (above right) is worked by beginning as you would with the LT. However, you insert the right-hand needle into the back of the second stitch and pull the yarn through to knit it (A and B), then insert your needle into the front stitch as if to purl and slip it (C). This slipped stitch is knit on the following round, and the resulting stitch leans to the left.
Three-Stitch Lift
This was the trickiest technique of all to figure out. After months of experimentation, I finally discovered that you pick up a stitch, do a yarnover, pick up another stitch, and then drop the stitch on your left-hand needle. The final part of the technique turned out to be something pretty simple—a centered double decrease, often referred to as s2kp2 (slip two stitches as if to knit two together, knit one, and pass the two slipped stitches over the knit stitch, which leaves the center stitch on the top).
Step 1 (Round 1): With yarn in back, using your right-hand needle, go through the stitch three rows below the next stitch on the left-hand needle, pick up the yarn, and pull it through the stitch (A).
Step 2: Yarnover.
Step 3: Go through the same stitch as you did in Step 1, pick up the yarn, and pull it through the stitch. You now have three working stitches on your right-hand needle (B).
Drop the next stitch on your left-hand needle (it's anchored three rows down so it won't get away from you).
Note: Technically, the Three-Stitch Lift is completed after Step 3; however, Steps 4 and 5 (included in the pattern text and charts in the two rounds following the Three-Stitch Lift round) tell you how to work the two extra stitches that were created in Steps 1-3.
Step 4 (Round 2): When you reach the three lifted stitches on the next round, either knit or purl them, depending on your pattern instructions (C). (You will have two extra stitches for each lift worked on this round.)
Step 5 (Round 3): When you reach these three stitches on the following round, work s2kp2, the centered double decrease, across these stitches. You will now be back to your original number of stitches (D).
projects
KONNICHIWA
CHOUWA
ORIGAMI
NINJA
IKEBANA
JAPANESE GARDEN
FUJI PEDICURE
SHIATSU
HAIKU
JAPANESE FAN TABI
BONSAI
GEISHA LOUNGE
SAMURAI
KABUKI BOOT
TSUNAMI
KARATSU
HANAMI LACE
OBI YOGA
INRO HIKING
KYOTO CABLE
KARATE CABLE
BIWA
KIMONO LACE
KAISO
TATAMI
SENSU
KARAOKE
KATSURA
SUMO SLIPPER
SAYONARA
konnichiwa
Konnichiwa is the Japanese greeting that means "good day," and I greet you as you enter the first pattern in my book. In Japanese culture, greetings are very important, and at a young age Japanese children are taught to offer them with enthusiasm. In that spirit, I offer these Konnichiwa socks to you.
I chose these socks to introduce you to a Japanese stitch that was new to me, and which I refer to as a "twist/slip." You are probably familiar with two stitches twisted to the right or left. This is a similar maneuver, but instead of knitting both of the stitches, one is knitted and one is slipped, creating an elongated stitch that provides a defined line. Once you master this technique, these comfortable socks are very easy and quick to knit.
Finished Measurements
8 ½" Foot circumference
10 ½" Foot length from back of Heel
9 ¾" Leg length to base of Heel
Yarn
Blue Sky Alpacas Worsted Hand Dyes (50% alpaca / 50% merino wool; 100 grams / 100 yards): 3 hanks #2100 Blue Jeans
Needles
One set of five double-pointed needles (dpn) size US 6 (4 mm) Change needle size if necessary to obtain correct gauge.
Notions
Stitch marker
Gauge
17 sts and 25 rnds = 4" (10 cm) in Stockinette stitch (St st)
Abbreviations
TSL (twist/slip left): Knit into back loop of second st, then insert tip of right-hand needle into front of first st as if to purl, slip both sts from needle together, allowing first st to be slipped rather than knit (see page 14).
TSR (twist/slip right): Insert right-hand needle into next 2 sts as if to k2tog, draw up a loop, bring tip of right-hand needle out through first st only, slip both sts from needle together, allowing second st to be slipped rather than knit (see page 14).
Stitch Patterns
Pattern A
(multiple of 10 sts; 2-rnd repeat)
Rnd 1: *[P2, k2] twice, p2; repeat from * to end.
Rnd 2: *K4, p2, k4; repeat from * to end. Repeat Rnds 1 and 2 for Pattern A.
Pattern B
(multiple of 10 sts; 14-rnd repeat)
Rnds 1 and 3: Knit.
Rnds 2 and 4: *P2, k6, p2; repeat from * to end.
Rnd 5: *K2, TSL, k2, TSR, k2; repeat from * to end.
Rnds 6 and 12: *P3, k4, p3; repeat from * to end.
Rnd 7: *K3, TSL, TSR, k3; repeat from * to end.
Rnds 8 and 10: *P4, k2, p4; repeat from * to end.
Rnd 9: *K4, TSL, k4; repeat from * to end.
Rnd 11: *K3, TSR, TSL, k3; repeat from * to end.
Rnd 13: *K2, TSR, k2, TSL, k2; repeat from * to end.
Rnd 14: Repeat Rnd 2.
Repeat Rnds 1-14 for Pattern B.
LEG
CO 40 sts. Divide sts evenly among 4 needles (10-10-10-10). Join for working in the rnd, being careful not to twist sts; place marker (pm) for beginning of rnd. Begin Pattern A; work even for 10 rnds. Next Rnd: Change to Pattern B; work even until 3 vertical repeats of Pattern B have been completed.
HEEL FLAP
Set-Up Row 1 (RS): K10, turn.
Set-Up Row 2: Slip 1, p19, working all 20 sts onto 1 needle for Heel Flap, and removing marker. Leave remaining 20 sts on 2 needles for instep. Row 1: Working only on 20 Heel Flap sts, *slip 1, k1; repeat from * to end.
Row 2: Slip 1, purl to end.
Repeat Rows 1 and 2 nine times.
TURN HEEL
Set-Up Row 1 (RS): Slip 1, k11, skp, k1, turn.
Set-Up Row 2: Slip 1, p5, p2tog, p1, turn.
Row 1: Slip 1, knit to 1 st before gap, skp (the 2 sts on either side of gap), k1, turn.
Row 2: Slip 1, purl to 1 st before gap, p2tog (the 2 sts on either side of gap), p1, turn.
Repeat Rows 1 and 2 twice, omitting final k1 and p1 sts in last repeat of Rows 1 and 2–12 sts remain.
GUSSET
Next Row (RS): Needle 1: Knit across Heel Flap sts, pick up and knit 11 sts along left side of Heel Flap, M1; Needles 2 and 3: Work even in Pattern B as established; Needle 4: M1, pick up and knit 11 sts along right side of Heel Flap, k6 from Needle 1. Join for working in the rnd; pm for beginning of rnd–56 sts (18-10-10-18).
Next Rnd: Needle 1: Knit to last 2 sts, skp; Needles 2 and 3: Work even as established; Needle 4: K2tog, knit to end–54 sts remain. Decrease Rnd: Needle 1: Knit to last 3 sts, skp, k1; Needles 2 and 3: Work even as established; Needle 4: K1, k2tog, knit to end–52 sts remain (16-10-10-16). Work even for 1 rnd. Repeat Decrease Rnd every other rnd 6 times–40 sts remain (10-10-10-10).
FOOT
Work even until Foot measures 9", or 1 ½" less than desired length from back of Heel.
Next Rnd: Change to St st (knit every rnd) across all sts.
TOE
Decrease Rnd: Needle 1: Knit to last 3 sts, skp, k1; Needle 2: K1, k2tog, knit to end; Needle 3: Knit to last 3 sts, skp, k1; Needle 4: K1, k2tog, knit to end–36 sts remain. Knit 1 rnd.
Repeat Decrease Rnd every other rnd 5 times–16 sts remain (4-4-4-4). Knit to end of Needle 1.
FINISHING
Break yarn, leaving long tail. Transfer sts from Needle 1 to Needle 4, and sts from Needle 3 to Needle 2. Using Kitchener st (see General Techniques, page 140), graft Toe sts. Weave in ends. Block lightly.
chouwa
The first reference I found to the word chouwa said it could be translated into English as "harmony." I have always felt that the pattern in these socks—an amazing meld of the lacy ripples of feather and fan stitch combined with cables—is symbolic of harmony. Imagine my surprise when I later discovered that this word is the title of a Japanese song that, when translated, includes these lyrics: "In the midst of silence, a single drop causes a ripple that spreads through the water at the bottom of the well."
These Chouwa—or harmony—socks have a simple rolled edge, followed by a short portion of twisted rib stitches that merges into the pleasingly textured pattern of simple cables, decreases, and yarnovers.
Finished Measurements
8 ½" Foot circumference
9 ¼" Foot length from back of Heel
9 ½" Leg length to base of Heel
Yarn
Lisa Souza Hardtwist Merino Petite Yarn (100% hand-dyed merino superwash wool; 100 grams / 500 yards):
1 hank Mulberry
Needles
One set of five double-pointed needles (dpn) size US 1 (2.25 mm) Change needle size if necessary to obtain correct gauge.
Notions
Stitch marker; cable needle (cn)
Gauge
30 sts and 44 rnds = 4" (10 cm) in Stockinette stitch (St st)
Abbreviations
C4F: Slip 2 sts to cn, hold to front, k2, k2 from cn.
Stitch Patterns
Pattern A
(multiple of 2 sts; 1-rnd repeat)
All Rnds: *K1-tbl, p1; repeat from * to end.
Pattern B
(multiple of 11 sts; 6-rnd repeat)
Rnd 1: *Yo, k1, yo, [k2tog] 4 times, [yo, k1] twice; repeat from * to end.
Rnds 2-4: Knit.
Rnd 5: *K3, C4F, k4; repeat from * to end.
Rnd 6: Knit.
Repeat Rnds 1-6 for Pattern B.
LEG
CO 66 sts. Divide sts evenly among 3 needles (22-22-22). Join for working in the rnd, being careful not to twist sts; place marker (pm) for beginning of rnd. Begin St st (knit every rnd); work even for 6 rnds
Next Rnd: Change to Pattern A; work even for 10 rnds
Next Rnd: Change to Pattern B; work even until piece measures approximately 8" from the beginning, ending with Rnd 6 of pattern
B, and decreasing 2 sts on last rnd–64 sts remain. Redistribute sts among 4 needles (16-16-16-16).
HEEL FLAP
Set-Up Row 1 (RS): K16, turn.
Set-Up Row 2: Slip 1, p31, working all 32 sts onto 1 needle for Heel Flap, and removing marker. Leave remaining 32 sts on 2 needles for instep.
Row 1: *Slip 1, k1; repeat from * to end.
Row 2: Slip 1, purl to end.
Repeat Rows 1 and 2 eleven times.
(Continues...)
Excerpted from Knitted Socks East and West by Judy Sumner, Yoko Inoue, Melanie Falick. Copyright © 2009 Judy Sumner. Excerpted by permission of ABRAMS.
All rights reserved. No part of this excerpt may be reproduced or reprinted without permission in writing from the publisher.
Excerpts are provided by Dial-A-Book Inc. solely for the personal use of visitors to this web site.
Table of Contents
Contents
INTRODUCTION,JAPANESE STITCH TECHNIQUES,
PROJECTS,
GENERAL TECHNIQUES, ABBREVIATIONS, AND SOURCES,
ACKNOWLEDGMENTS,