


Paperback
-
PICK UP IN STORECheck Availability at Nearby Stores
Available within 2 business hours
Related collections and offers
Overview
You don't have to be an expert to crochet and collect these adorable kitties — the patterns are suitable for crocheters of all skill levels. Easy-to-follow instructions are accompanied by full-color photos and simple drawings. The directions explain every stage, from ears to tail, and some of the patterns include accessories and costume items. Plus, there are bonus patterns for a cat bed, food bowls, and more!
"An overload of cuteness! I promise when you see these cute cats you'll want to make them all. If you have kids they'll love them! This would be great for making fun homemade gifts for the kids." — Dear Creatives

Product Details
| ISBN-13: | 9780486813431 |
|---|---|
| Publisher: | Dover Publications |
| Publication date: | 06/21/2017 |
| Series: | Dover Crafts: Crochet |
| Pages: | 112 |
| Product dimensions: | 8.10(w) x 10.90(h) x 0.30(d) |
About the Author
Read an Excerpt
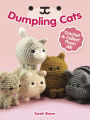
Dumpling Cats
Crochet & Collect Them All!
By Sarah Sloyer
Dover Publications, Inc.
Copyright © 2017 Sarah SloyerAll rights reserved.
ISBN: 978-0-486-81343-1
CHAPTER 1
tater
Rumor has it that Tater's actual name is something like Clyde or Dan; nobody can really remember for sure. He just bears such a striking resemblance to a tater tot that the nickname stuck. Thankfully, he's a friendly and easygoing fellow, so he doesn't mind.
FINISHED SIZE: 2Ģ in/7cm tall (May vary depending on your hook size, yarn type, and tension)
SKILL LEVEL: Easy
MATERIALS
• Lion Brand® Vanna's Choice® 3.5oz/100g, 170yds/156m (100% acrylic) — one skein each: #806-100 White (Color A), #860-306 Tangerine Mist (Color B)
• Size D-3 (3.25mm) crochet hook
• Yarn needle
• 6mm safety eyes (2)
• Pink embroidery floss (for nose and mouth)
• Polyester stuffing
• Wooden stuffing stick
• Stitch markers and pins
Head and Body
In Color A:
Rnd 1: Ch 5. Starting in second ch from hook, sc 3. In 4th st, sc 4. On other side of foundation chain, sc 2. In 3rd st, sc 4 — 13 sts.
Rnd 2: Sc 4, sc 3 into next st, inc in next st, sc 5, inc in next st, sc 3 into next st — 19 sts.
Rnd 3: In first st, change to Color B; sc 2 more in same st for a total of 3 sc in the first st. Sc 3 into next 3 sts, sc 2, inc in next 2 sts, sc 8, inc in next 2 sts, sc 1 — 31 sts.
Rnds 4-5: Sc in all 31 sts — 31 sts.
Rnd 6: Sc 2, (inc in next st, sc 1) 5 times, sc in remaining 19 sts — 36 sts. Pause here to place eyes and embroider nose and mouth. Eye placement: between Rnds 2-3, 6 sts apart.
Rnds 7-16: Sc in all 36 sts — 36 sts.
Rnd 17: Sc 2, dec, (sc 4, dec) 5 times, sc 2 — 30 sts.
Rnd 18: (Sc 3, dec) 6 times — 24 sts. Begin stuffing.
Rnd 19: Sc 1, dec, (sc 2, dec) 5 times, sc 1 — 18 sts.
Rnd 20: (Sc 1, dec) 6 times — 12 sts. Continue stuffing.
Rnd 21: Dec in all sts — 6 sts.
Fasten off with a slip stitch and use yarn needle to weave tail through the front loops of the remaining 6 stitches, pulling tightly to close the hole. Weave in tail.
ASSEMBLY
Pin and sew pieces to body as shown.
Ears (Make 2)
In Color B
Rnd 1: Start 6 sc In an adjustable ring — 6 sts.
Rnd 2: (Sc 2, Inc In next st) repeat 2 times — 8 sts.
Rnd 3: Sc In all 8 sts — 8 sts.
Rnd 4: (Sc 3, Inc In next st) repeat 2 times — 10 sts.
Rnd 5: Sc In all 10 sts — 10 sts.
Fasten off with a slip stitch and leave a tall for sewing. Do not stuff.
Feet (Make 4)
In Color B:
Rnd 1: Start 5 sc In an adjustable ring — 5 sts.
Rnd 2: Sc In all 5 sts — 5 sts.
Fasten off with a slip stitch and leave a tall for sewing. Do not stuff.
Tail
In Color A:
Rnd 1: Start 6 sc In an adjustable ring — 6 sts
Rnds 2-3: Sc In all 6 sts — 6 sts.
Rnd 4: In first st, change to Color B. Sc in remaining 5 sts — 6 sts.
Rnds 5-7: Sc in all 6 sts — 6sts.
Fasten off with a slip stitch and leave a tall for sewing. Do not stuff.
waffles
Waffles spends most of her day lounging around in her cat bed with a good book. She's a voracious reader! She doesn't mind sharing her comfy spot, as long as you don't mind listening to her read out loud.
FINISHED SIZE: 2½ in/6.5cm tall (May vary depending on your hook size, yarn type, and tension)
SKILL LEVEL: Intermediate
MATERIALS
• Lion Brand® Vanna's Choice® 3.5oz/100g, 170yds/156m (100% acrylic) — one skein each: #860-100 White (Color A), #860-306 Tangerine Mist (Color B), #860-153 Black (Color C)
• Size D-3 (3.25mm) crochet hook
• Yarn needle
• 6mm safety eyes (2)
• Pink embroidery floss (for nose and mouth)
• Polyester stuffing
• Wooden stuffing stick
• Stitch markers and pins
Head
In Color A:
Rnd 1: Ch 4. Starting in 2nd ch from hook, sc in next 2 sts. Sc 4 into next st. On other side of foundation chain, sc 1. Sc 4 into next st — 11 sts.
Rnd 2: Sc 10. In last st, change to Color B — 11 sts.
Rnd 3: Sc 1. In next st, change to Color A. Sc in next st, inc in next 3 sts, sc in next 2 sts, inc in next 2 sts. Inc in last st, changing to Color B in second sc of the increase — 17 sts.
Rnd 4: Sc 3 into first st, sc 3 into second st, changing to Color A in third sc. Sc 3 into next 2 sts. Inc in next 3 sts. Sc in next 7 sts, inc in next st. Inc in next st, changing to Color B in second sc of the increase. Inc in last st — 31 sts.
Rnd 5: Sc in first 5 sts. In next st, change to Color C. Sc in next 7 sts. In next st, change to Color A. Sc in next 15 sts. In next st, change to Color B. Sc in next 2 sts — 31 sts.
Rnd 6: Sc in first 2 sts. Inc in next st, sc 1. Inc in next st, change to Color C in next st. (Inc in next st, sc 1) 3 times. Sc in next st. In next st, change to Color A. Sc in next 14 sts. In next st, change to Color B. Sc in next 2 sts — 36 sts. Pause here to place eyes and embroider nose and mouth. Eye placement: between Rnds 3-4, approximately 4 sts apart.
Rnd 7: Sc in first 7 sts, change to Color B in next st. Sc in next 10 sts, change to Color A in next st. Sc in next 14 sts. In next st, change to Color B. Sc in next 2 sts — 36 sts.
Rnd 8: Sc in first 7 sts, change to Color B in next st. Sc in next 10 sts, change to Color A in next st. Sc in next 17 sts — 36 sts.
Rnds 9-12: Continuing in Color A, sc in all 36 sts — 36 sts.
Rnd 13: Sc 2, dec, (sc 4, dec) 5 times, sc 2 — 30 sts.
Rnd 14: (Sc 3, dec) 6 times — 24 sts.
Rnd 15: Sc 1, dec, (sc 2, dec) 5 times, sc 1 — 18 sts. Begin stuffing.
Rnd 16: (Sc 1, dec) 6 times — 12 sts.
Rnd 17: Dec in all sts — 6 sts.
Fasten off with a slip stitch and use yarn needle to weave tail through the front loops of the remaining 6 stitches, pulling tightly to close the hole. Weave in tail.
Body
In Color C:
Rnd 1: Start 6 sc in an adjustable ring — 6 sts.
Rnd 2: Inc in all 6 sts — 12 sts.
Rnd 3: (Sc 1, inc in next st) 6 times — 18 sts.
Rnd 4: Sc 1, inc in next st, (sc 2, inc in next st) 5 times, sc 1 — 24 sts.
Rnds 5-7: Change to Color B in first st. Sc in next 10 sts, change to Color A in next st. Sc in next 12 sts — 24 sts.
Rnds 8-9: Change to Color C in first st. Sc in next 5 sts, change to Color B in next st, sc in next 4 sts, change to Color A in next st, sc in next 12 sts — 24 sts.
Rnd 10: Change to Color B in first st. Sc in next 3 sts, dec. Sc in next 4 st, insert hook into FLO of next 2 st, YO with Color A and pull through to decrease, continuing with Color A. (Sc in next 4 sts, dec) 2 times — 20 sts.
Fasten off with a slip stitch, leaving a tail for sewing. Stuff lightly.
Leg 1
In Color A:
Rnd 1: Start 6 sc in an adjustable ring — 6 sts.
Rnds 2-3: Sc in all 6 sts — 6 sts.
Rnd 4: Change to Color C in first st. Sc in remaining 5 sts — 6 sts.
Rnds 5-6: Sc in all 6 sts — 6 sts.
Fasten off with a slip stitch, leaving a tail for sewing. Do not stuff.
Leg 2 (Make 2)
In Color A:
Rnd 1: Start 6 sc in an adjustable ring — 6 sts.
Rnds 2-6: Sc in all 6 sts — 6 sts.
Fasten off with a slip stitch, leaving a tail for sewing. Do not stuff.
Leg 3
In Color C:
Rnd 1: Start 6 sc in an adjustable ring — 6 sts.
Rnds 2-3: Sc in all 6 sts — 6 sts.
Rnd 4: Change to Color A in first st. Sc in remaining 5 sts — 6 sts.
Rnds 5-6: Sc in all 6 sts — 6 sts.
Fasten off with a slip stitch, leaving a tail for sewing. Do not stuff.
Ears (Make 1 in Each Color)
In Colors B and C:
Rnd 1: Start 5 sc in an adjustable ring — 5 sts.
Rnd 2: Sc 1, inc in next st, sc 2, inc in next st — 7 sts.
Rnd 3: Sc in all 7 sts — 7 sts.
Rnd 4: Sc 2, Inc In next st, sc 3, Inc In next st — 9 sts.
Fasten off with a slip stitch and leave a tall for sewing. Do not stuff; press flat.
Tail
In Color C:
Rnd 1: Start 6 sc In an adjustable ring — 6 sts.
Rnds 2-3: Sc In all 6 sts — 6 sts.
Rnd 4: Change to Color B In first st. Sc In remaining 5 sts — 6 sts.
Rnds 5-7: Sc In all 6 sts — 6 sts.
Fasten off with a slip stitch, leaving a tall for sewing. Do not stuff.
ASSEMBLY
Pin and sew pieces to body as shown. Give the body additional stuffing as you sew It to the head.
cat bed
FINISHED SIZE: 3½ in/9cm by 1½ in/4cm (May vary depending on your hook size, yarn type, and tension)
SKILL LEVEL: Easy
MATERIALS
• Lion Brand® Vanna's Choice® 3.5oz/100g, 170yds/156m (100% acrylic) — one skein: #860-173 Dusty Green (Color A), #860-123 Beige (Color B)
• Size D-3 (3.25mm) crochet hook
• Yarn needle
• Stitch markers and pins
Bed Edge
In Color A:
Rnd 1: Ch 45. Starting in second ch from hook, sc in next 43 sts. Sc 4 into next st. On other side of foundation ch, sc in next 42 sts. Sc 4 into next st — 93 sts.
Rnds 2-7: Sc in all 93 sts — 93 sts.
Note: Photo taken after Round 3.
Do not fasten off or stuff; press flat and close bottom by single crocheting through both sides.
Yarn over and pull through to fasten off, leaving an extra long tail for sewing (about 20in/51cm long).
Bed Bottom (Make 2)
In Color A:
Rnd 1: Ch 4. Starting in 2nd ch from hook, sc in next 2 sts. Sc 4 into next st. On other side of foundation chain, sc 1. Sc 4 into next st — 11 sts.
Rnd 2: Sc 3, sc 3 into next st, inc in next st, sc 4, inc in next st, sc 3 into next st — 17 sts.
Rnd 3: Sc 4, inc in next 3 sts, sc 6, inc in next 3 sts, sc 1-23 sts.
Rnd 4: Sc 5, (inc in next st, sc 1) 3 times, sc 6, (inc in next st, sc 1) 3 times — 29 sts.
Rnd 5: Sc 6, (inc in next st, sc 2) 3 times, sc 5, (inc in next st, sc 2) 3 times — 35 sts.
Rnd 6: Sc 7, (inc in next st, sc 3) 3 times, sc 5, (inc in next st, sc 3) 2 times, inc in next st, sc 2 — 41 sts.
Rnd 7: Sc 7, (inc in next st, sc 4) 3 times, sc 5, (inc in next st, sc 4) 2 times, inc in next st, sc 3-47 sts.
Rnd 8: Sc 8, (inc in next st, sc 5) 3 times, sc 4, (inc in next st, sc 5) 2 times, inc in next st, sc 4-53 sts.
After you finish the first bottom, fasten off and weave in tail. When you finish the second, do not fasten off. Remove the stitch marker and line up both bed bottoms, as shown, with the wrong sides facing in and the right sides facing out. Insert your hook through both layers and slip stitch in each stitch around to join the bottoms together. When the bottoms are joined, fasten off and weave in tail.
ASSEMBLY (BED BOTTOM)
Thread the leftover tail from the Bed Edge onto a yarn needle. Line the edge of the bed up along the bottom of the bed, as shown, leaving an opening of about 8 stitches.
Using the leftover yarn tail, whipstitch the two pieces together as shown. When the pieces are securely joined, weave in your yarn tail.
Bed Cushion
In Color B:
Rnd 1: Ch 4. Starting In 2nd ch from hook, sc In next 2 sts. Sc 4 Into next st. On other side of foundation chain, sc 1. Sc 4 Into next st — 11 sts.
Rnd 2: Sc 3, sc 3 Into next st, Inc In next st, sc 4, Inc In next st, sc 3 Into next st — 17 sts.
Rnd 3: Sc 4, Inc In next 3 sts, sc 6, Inc In next 3 sts, sc 1 — 23 sts.
Rnd 4: Sc 5, (Inc In next st, sc 1) 3 times, sc 6, (Inc In next st, sc 1) 3 times — 29 sts.
Rnd 5: Sc 6, (Inc In next st, sc 2) 3 times, sc 5, (Inc In next st, sc 2) 3 times — 35 sts.
Rnd 6: Sc 7, (Inc In next st, sc 3) 3 times, sc 5, (Inc In next st, sc 3) 2 times, Inc In next st, sc 2 — 41 sts.
Rnd 7: Sc 7, (Inc In next st, sc 4) 3 times, sc 5, (Inc In next st, sc 4) 2 times, Inc In next st, sc 3 — 47 sts.
Rnd 8: In BLO sc In all 47 sts — 47 sts.
Rnd 9: Sc in all 47 sts — 47 sts.
Rnd 10: In BLO sc 7, (dec, sc 4) 3 times, sc 5, (dec, sc 4) 2 times, dec, sc 3 — 41 sts.
Rnd 11: Sc 7, (dec, sc 3) 3 times, sc 5, (dec, sc 3) 2 times, dec in next st, sc 2 — 35 sts.
Rnd 12: Sc 6, (dec, sc 2) 3 times, sc 5, (dec, sc 2) 3 times — 29 sts.
Rnd 13: Sc 5, (dec, sc 1) 3 times, sc 6, (dec, sc 1) 3 times — 23 sts.
Rnd 14: (Sc 2, dec) 5 times, sc 3 — 18 sts.
ASSEMBLY (BED CUSHION)
Do not stuff. Fasten off with a slip stitch and use yam needle to weave tail through the front loops of the remaining 6 stitches, pulling tightly to close the hole. This is the bottom of the cushion. Weave in tail and press flat. Place in assembled bed, bottom facing down.
cheeks
The favorite time of day for Cheeks is lunchtime; he never wants it to end! So much so, in fact, that he likes to sneak extra food into his cheeks like a chipmunk and save it as a snack for later. Gross? Perhaps. Clever? Definitely.
FINISHED SIZE: 3in/7.5cm tall (May vary depending on your hook size, yarn type, and tension)
SKILL LEVEL: Easy
MATERIALS
• Lion Brand® Vanna's Choice® 3.5oz/100g, 170yds/156m (100% acrylic) — one skein: #860-098 Fisherman (Color A)
• Size D-3 (3.25mm) crochet hook
• Yarn needle
• 6mm safety eyes (2)
• Pink embroidery floss (for nose and mouth)
• Polyester stuffing
• Wooden stuffing stick
• Stitch markers and pins
Head and Body
In Color A:
Rnd 1: Ch 10. Starting in second ch from hook, sc 8. In 9th st, sc 4. On other side of foundation chain, sc 7. In 8th st, sc 4 — 23 sts.
Rnd 2: Sc 9, (sc 3) in 10th st, inc in 11th st, sc 10, inc in next st, (sc 3) in next st — 29 sts.
Rnd 5: (Sc 1, sc 3 into next st) 5 times, (sc 5, inc in next st) 3 times, sc 1 — 42 sts.
Rnds 3-4: Sc in all 29 sts — 29 sts.
Rnd 5: (Sc 1, sc 3 into next st) 5 times, (sc 5, inc in next st) 3 times, sc 1 — 42 sts.
Rnd 6: Sc in all 42 sts — 42 sts. Pause here to place eyes and embroider nose and mouth as in main photo. Eye placement: between Rnds 2-3, 4 sts apart.
Rnd 7: (Sc 6, inc in next st) 6 times — 48 sts.
Rnds 8-20: Sc in all 48 st — 48 sts.
Rnd 21: Sc 3, dec, (sc 6, dec) 5 times, sc 3 — 42 sts.
Rnd 22: (Sc 5, dec) 6 times — 36 sts. Begin stuffing.
Rnd 23: Sc 2, dec, (sc 4, dec) 5 times, sc 2 — 30 sts.
Rnd 24: (Sc 3, dec) 6 times — 24 sts.
Rnd 25: Sc 1, dec, (sc 2, dec) 5 times, sc 1 — 18 sts.
Rnd 26: (Sc 1, dec) 6 times — 12 sts.
Rnd 27: Dec in all sts — 6 sts.
Fasten off with a slip stitch and use yarn needle to weave tail through the front loops of the remaining 6 stitches, pulling tightly to close the hole. Weave In tall.
Tail
In Color A:
Rnd 1: Start 7 sc In an adjustable ring — 7 sts.
Rnds 2-4: Sc in all 7 sts — 7 sts.
Rnd 5: Sc 1, dec, sc 4 — 6 sts.
Rnds 6-8: Sc in all 6 sts — 6 sts.
Fasten off with a slip stitch and leave a tail for sewing. Stuff lightly.
Feet (Make 4)
In Color A:
Rnd 1: Start 7 sc in an adjustable ring — 7 sts.
Rnds 2-3: Sc in all 7 sts — 7 sts.
Fasten off with a slip stitch and leave a tail for sewing. Do not stuff.
ASSEMBLY
Pin and sew pieces to body as shown.
Ears (Make 2)
In Color A:
Rnd 1: Start 5 sc in an adjustable ring — 5 sts.
Rnd 2: Sc 1, inc in next st, sc 2, inc in next st — 7 sts.
Rnd 3: Sc in all 7 sts — 7 sts.
Rnd 4: Sc 2, inc in next st, sc 3, inc in next st — 9 sts.
Fasten off with a slip stitch and leave a tail for sewing. Do not stuff; press flat.
(Continues...)
Excerpted from Dumpling Cats by Sarah Sloyer. Copyright © 2017 Sarah Sloyer. Excerpted by permission of Dover Publications, Inc..
All rights reserved. No part of this excerpt may be reproduced or reprinted without permission in writing from the publisher.
Excerpts are provided by Dial-A-Book Inc. solely for the personal use of visitors to this web site.
Table of Contents
THE DUMPLING CATSTater
Waffles
Cheeks
Paula
Dusty
Blanche
Finneus
Meatball
Roly
Chuck
Boomer
Wilbur
Daisy
Misty
Minerva
Todd
Reggie
Ruby
Tank
Pudge
Chloe
Bug
Felipe
Tia
Poe
BONUS PATTERNS
Cat Bed
Food Bowls
Cardboard Box
Related Subjects
Customer Reviews
Explore More Items


