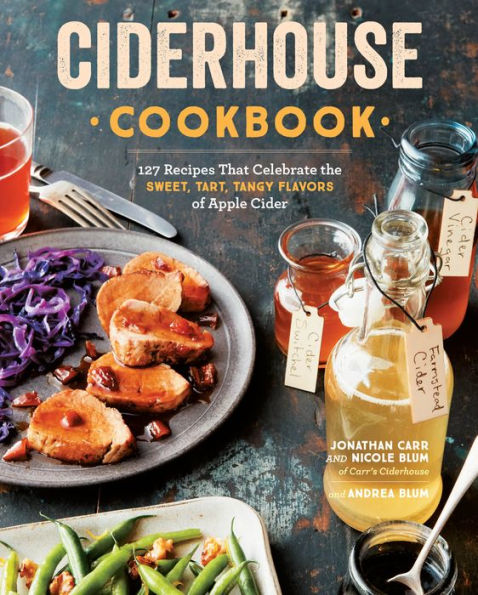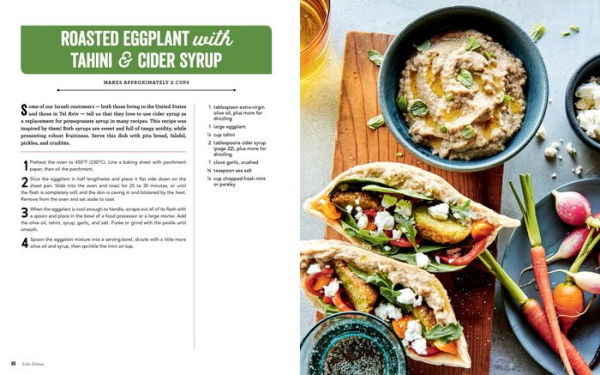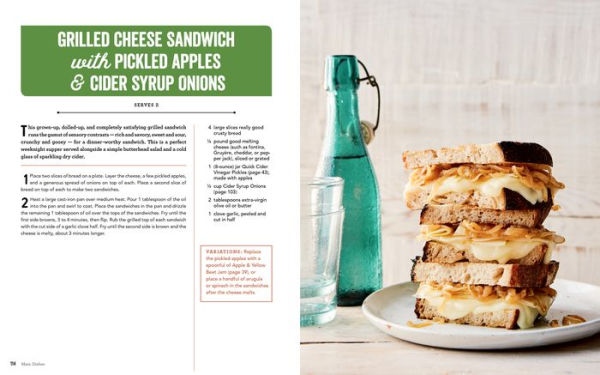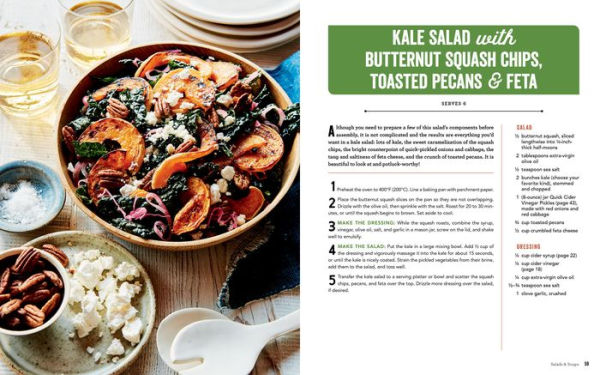
Ciderhouse Cookbook: 127 Recipes That Celebrate the Sweet, Tart, Tangy Flavors of Apple Cider
232
Ciderhouse Cookbook: 127 Recipes That Celebrate the Sweet, Tart, Tangy Flavors of Apple Cider
232Paperback
-
SHIP THIS ITEMShips in 1-2 daysPICK UP IN STORE
Your local store may have stock of this item.
Available within 2 business hours
Related collections and offers
Overview

Product Details
| ISBN-13: | 9781612129402 |
|---|---|
| Publisher: | Storey Publishing, LLC |
| Publication date: | 08/07/2018 |
| Pages: | 232 |
| Product dimensions: | 7.90(w) x 9.90(h) x 0.60(d) |
About the Author
Read an Excerpt
CHAPTER 1
FOUNDATION RECIPES
A very old apple tree, planted by Jonathan's grandfather Patrick, still stood in front of the Carr family home in Ireland when we lived there in the late 1990s. Though we weren't certain what variety the apples were, we knew they weren't exactly good to eat out of hand, or even to cook with! When the tree produced amply, we unpacked our home juicer and set out to make ourselves some vinegar, completely ignoring the fact that hard cider is the first step to making vinegar. And it was! We were blown away by the wild-fermented cider that slowly bubbled away in our cold pantry (let's just say we didn't end up making any vinegar). We did nothing special to it, and the hard cider was really tasty — an important lesson that we have carried with us to this day.
When we arrived in New England, we continued to make traditional hard cider, and like so many cider makers, our basement had several carboys fermenting all winter. Every product we have added to our line has started out as a small batch, usually made for holiday gifts for our friends and family. Our house is like a test laboratory, and fermentation seems to be happening in all corners. The kids are getting used to the lava lamp–like "mothers" floating around in jars and carboys.
Not only are sweet and fermented ciders enjoyable to drink or cook with in their own right, but they also serve as the basis for many wonderful kitchen staples: vinegars and syrups, as well as shrubs, fortified drinks and cocktails, and, of course, a hearty wassail (the traditional English drink to celebrate apple fertility)! Using the juice of the apple in all its wonderful fermentations and permutations is an easy entry into creative and delicious cooking. This chapter contains the instructions for making the versatile cider products that are called for in many of our recipes.
As orchardists and cider makers, we are fairly awash in cider at certain times of the year, and we aim to make the most of it by incorporating cider and cider products into our home cooking. But even if you don't live next to an orchard, you can frugally make many of these recipes, especially if you press and/or ferment your own cider. Buying a fancy bottle of hard cider to cook with can feel like an extravagance, but fermenting your own gallon of cider (which you can typically purchase for $6 to $8) yields around five wine bottles' worth of hard cider! Of course, if making your own cider and cider products isn't in the cards right now, supporting local cider makers in your area is a great idea, as is sourcing from nearby orchards for your ingredients. Cider syrup, apple cider vinegars, switchel syrup, and shrubs can be found online (like on our website — www.carrsciderhouse.com — and others listed in the resources) and in a few specialty shops across the country (ask yours to carry some).
Hard Cider
MAKES 5–6 GALLONS
We are traditionalists here at our orchard. This means we don't believe in making many interventions during the cider fermentation process, such as adding prefermentation sulfites, yeast nutrients, or commercial yeasts. Of course, this philosophy entails some risk, as not all wild fermentations will be superior. But it is a worthy gamble, because most wild fermentations are incredibly flavorful and reveal the specific character of our locally adapted wild yeast strains. There are many excellent comprehensive books on making hard ciders (see note), so we won't delve too deeply into the basic techniques and assume you have some previous knowledge.
Our recipe uses a two-stage process and a wild apple starter culture. It is crucial that you use unsprayed fruit, as some common orchard fungicides will inhibit the natural action of the wild yeasts that are normally present on the fruit. Without those yeasts, fermentation may be hobbled, producing a "stuck" fermentation or even failing completely. You will need a 5-gallon carboy (ideally, it's best to have two carboys) for the main fermentation.
There are many excellent cider companies popping up across the country. If you can't make your own hard cider, we encourage you to seek out those made locally by growers in your area (see Resources).
3– 4 pounds wild and/or unsprayed apples or crabapples
5 gallons sweet cider (unpasteurized, if possible, and containing no preservatives)
Note: If any of the terms or processes we describe below are unfamiliar, please purchase a book on basic cider- or winemaking (as cider is fundamentally a type of fruit wine). We have found Cider by Annie Proulx and Lew Nichols, The New Cider Maker's Handbook by Claude Jolicoeur, and Home Winemaking Step by Step by Jon Iverson particularly helpful. These books elaborate upon many useful concepts that are beyond the scope of this cookbook.
1 MAKE THE STARTER CULTURE: Press or use a juicer to make 1 quart of cider from the unsprayed apples or crabapples. Pour into a clean 1-quart jar and cap loosely. Let sit on your countertop at room temperature for a few days until the cider begins to ferment. You'll know fermentation is underway when the cider gets fizzy and cloudy. Taste the cider to see if you detect a little sparkle on the tongue, and you'll know that the yeasts have started.
2 INOCULATE THE MAIN FERMENTATION: Pour the starter culture into a clean 5-gallon glass carboy and fill the carboy with sweet cider up to the neck. You might have a little sweet cider left over — drink it! Place the carboy in a cool location (less than 50°F/10°C is preferred; a basement would be perfect) and fit the carboy opening with an airlock half-filled with water.
3 MONITOR THE FERMENTATION: It may take a week or two for the fermentation to get well under way. You will be able to gauge the level of fermentation by watching bubbles come through the water in the airlock (more bubbles mean a stronger ferment).
4 DETERMINE WHEN FERMENTATION IS FINISHED: The bubbling will cease when the fermentation is complete. This may take anywhere from a few weeks to several months, depending on how cool your cider is kept. You may need to sit down and give the airlock your attention for 5 minutes to determine if the cider is still fermenting, as the bubbling can get very sporadic at the end. Stick a straw into the carboy and taste the cider. If there are no bubbles and there is some perceptible sweetness, you may have what some call a "stuck" fermentation, or what others call a delicious naturally sweet hard cider.
5 RACK YOUR CIDER (IF YOU HAVE AN EXTRA CARBOY): Use food-grade tubing from a winemaking supply company to carefully siphon the cider to a new, clean carboy by using an auto-siphon or simply sucking on one end of the tubing. Racking (transferring) the cider away from the lees (spent yeast sediment) will allow it to age and clarify further. Add water or other hard cider to fully top up the carboy to its neck to reduce the amount of surface area of cider that is in contact with air. If you don't have an extra carboy, you can age the cider on the yeast lees.
6 SULFITE (OPTIONAL): You may choose to sulfite the cider at this time in order to preserve it and to slow oxidation. If you end up bulk-aging the cider for months on end, you may wish to sulfite just prior to bottling. Not being huge fans of chemicals, we advocate for minimum intervention, but sulfites do a marvelous job of preventing the cider from developing a sherry-like flavor and losing fruitiness, which indicates that oxidation has occurred. A low dose, such as between 20 and 40 ppm (1/8 to 1/4 teaspoon of potassium metabisulfite for 5 gallons of cider), will be sufficient if you plan to drink the cider within the year. If you have made your cider from tannic apples (such as traditional English or French cider apples, or loads of crabapples in the press blend), those tannins will serve as natural antioxidants to also help the cider keep well.
7 BULK AGE: If necessary, age the cider in the carboy for a month or two, until it becomes clearer and fully matures. It may clarify beautifully right after fermentation or remain hazy despite months of aging — such are the mysteries of natural fermentation! And both results can be delicious.
8 BOTTLE: If your cider is fully dry (no sugars are left) and has clarified to your satisfaction, now is a good time to bottle. Check the density of the cider with a hydrometer to make sure there is absolutely no residual sugar before bottling, or your bottles could potentially explode. Add a dose of sulfites if you are using them (see step 6) and mix well. Siphon into clean wine or beer bottles and cork or cap. If you have not added sulfites, the cider may start to oxidize after a few months (giving it a sherry-like character), which may or may not be to your taste.
If you are bottling a naturally sweet hard cider (some residual sugars are left), don't cap or cork the bottles unless you pasteurize the cider in the bottles; otherwise, your bottles could explode if fermentation restarts in the sealed bottles. You could seal the bottles with a little square of plastic wrap held in place with a rubber band, so that if fermentation recommences, the gas can escape. It's not glamorous, but it's cheap and safe! Alternatively, seal bottles with tasting corks (also called bartop closures or spirit corks). They are easy to push in and look smart, and if any pressure develops in the bottle, they will be pushed out.
CRABAPPLE PICKING TIPS
Crabapples grow practically everywhere — field edges, city parks, roadsides, and suburban yards. Beware, though — some crabapples are far too bitter for most people to use. Taste them first and pick one that is agreeably zingy and tannic, but not injurious to your palate. In general, we find that the larger red crabapples (1 to 2 inches) are more suitable than the bird crabs (less than 1 inch).
TOP TEN RECOMMENDATIONS FOR MAKING NATURAL HARD CIDER
1 IT IS BEST TO USE WILD, BIODYNAMIC, OR UNSPRAYED APPLES FOR MAKING YOUR CIDER. Organic apples are acceptable, but organic orchards can rely on heavy metals and sulfur to control fungal diseases. Our experience shows that natural yeast populations on the apple's surface are decimated by conventional chemical spray regimes, including those based on ostensibly "eco" integrated pest management (IPM) practices. Conversely, cider made from unsprayed apples will easily initiate a healthy ferment with diverse and flavorful outcomes.
2 AVOID USING FRUIT OR CIDER MADE FROM TREES THAT HAVE BEEN FERTILIZED. Such fruit tends to grow larger and contain relatively more water, diluting flavor. Additionally, the excess nitrogen present in the cider can be utilized by the yeasts, resulting in an undesirable rapid fermentation. Smaller apples make the best hard cider, as they have a higher ratio of surface area to volume. This is important because the flesh just below the skin is where most of the fruit's sugar and flavor compounds are concentrated.
3 LATE-SEASON OR "WINTER" APPLES WITH THE HIGHEST SUGARS AND ACIDITY MAKE THE MOST LONG-LASTING, ROBUST, AND FLAVORFUL CIDERS. These include Winesap, Golden Russet, GoldRush, and Baldwin. Traditional European cider apples (if you are lucky enough to get your hands on some) replete with bitter tannins, like Dabinett or Kingston Black, are also valuable, as the tannins serve to stabilize and protect the cider from oxidation, as well as provide "mouthfeel." And then there are the legendary American hard cider apples: Harrison, Grimes Golden, and Hewe's Crab, to name a few. They vary in season of ripeness, but what made them famous is that they all have a very high sugar content as well as good acidity. This leads to a higher final alcohol level and also helps the cider keep for longer. But lastly, let's not get too fixated on pedigree! Some of the best ciders we have ever made were from blends of nameless wild apples, or apples foraged from gnarled old McIntosh trees.
4 YOU CAN MAKE HARD CIDER FROM STORE-BOUGHT SWEET CIDER. Say you can't get ahold of any fancy cider apples or press your own from foraged fruit. You won't get to revel in the glories of your cider's rustic provenance, but no worries! Just use some gallon jugs of a good, tangy local sweet cider. Since purchased cider is nearly always pasteurized these days, you'll have to use the wild starter culture method or pitch a commercial yeast. Commercial yeasts are nearly foolproof in terms of fermenting reliably, but they tend to proceed too rapidly and produce cider with a thin character. If you choose to use commercial yeast, opt for a cold-fermenting wine strain, like a German Steinberg type, or an English cider yeast that will ferment slowly but retain more fruitiness.
5 FERMENT AT COOL CELLAR TEMPERATURES; 45 TO 50°F (7–10°C) IS BEST. Don't worry if some books say to keep things warmer. Higher temperatures lead to rapid fermentations and less final fruitiness, and they encourage the proliferation of bacteria. This is not necessarily bad (taste the deliciously funky sidra from Asturias), but it is more likely to lead to vinegar bacteria making their presence known.
6 TAKE YOUR TIME. Fermentation at cool temperatures can take months and months. This is a good sign and will result in a superior hard cider. The British were obsessed with slow fermentation — which was well known as a best practice — during the peak of the "modern" traditional cidermaking era in the early to mid-1900s (as documented by reports from Great Britain's former Long Ashton Research Station). They also believed that particular apple cultivars were likely to ferment more slowly than others, which in the best years resulted in "vintage" cider.
7 RACK THE CIDER AT THE END OF FERMENTATION TO HELP IT SETTLE AND CLARIFY. When the cider is almost completely dry, carefully siphon or pump it from the original carboy to a new, clean vessel while avoiding stirring up the lees. Direct the stream of cider to the side wall of the new carboy, well below the liquid's surface, to avoid oxygenating the cider.
8 IF YOU WANT TO FURTHER CLARIFY YOUR CIDER, USE GENTLE AND NATURAL BENTONITE CLAY. Whisk 1 teaspoon of prilled bentonite (from a winemaking supply shop) into 1/2 cup of warm water (hint: add the bentonite gradually), let it fully hydrate for 1 hour, and then carefully mix it into the cider (while trying not to aerate the cider). After a few days, the proteins and other positively charged particles in the cider will bond to the clay and drop to the bottom of the carboy, resulting in a brighter cider without compromising its depth of flavor. Caution: Don't dump the sediment down the drain! Clay can clog drain pipes, so toss it under a tree or in a compost pile where the nitrogen-rich spent yeast can be used by a grateful plant.
9 DON'T WAIT TOO LONG TO BOTTLE AFTER FERMENTATION IS COMPLETE, BUT DON'T BOTTLE TOO SOON, EITHER. When the cider is completely dry to taste and you suspect the batch is done, use a hydrometer to make certain there is no residual sugar. Do not bottle if there is any residual sugar unless you know exactly what you are doing, as refermentation could lead to exploding bottles. Try to minimize aeration during bottling. Bottle the cider still (flat) for the traditional experience, or bottle-condition (an advanced technique) if you care for some bubbles. If you go the natural route and elect not to sulfite prior to bottling, the cider will oxidize and possibly eventually turn to vinegar. This is not a bad outcome, as you can surely use the vinegar, but for best drinking quality, keep track of your bottles and drink them up quickly in season!
10 INCONSISTENT RESULTS ARE TOTALLY ACCEPTABLE. Sometimes wild ferments yield the best cider in the world. Sometimes it's a little funky but still absolutely enjoyable (especially with a washed-rind cheese). Very rarely, you might need to pitch a batch or send it straight to the vinegar barrel. Have faith. Take notes on each batch and develop your own best practices. Enjoy the variety of results. It's all part of the process!
(Continues…)
Excerpted from "Cider House Cookbook"
by .
Copyright © 2018 Andrea Blum Nicole Blum, Jonathan Carr.
Excerpted by permission of Storey Publishing.
All rights reserved. No part of this excerpt may be reproduced or reprinted without permission in writing from the publisher.
Excerpts are provided by Dial-A-Book Inc. solely for the personal use of visitors to this web site.


