


Paperback
-
PICK UP IN STORECheck Availability at Nearby Stores
Available within 2 business hours
Related collections and offers
Overview
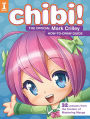
This book (and your fuzzy-costumed tour guide Mochy) will teach you everything you need to know about drawing chibis! From the word "short" in Japanese, this manga illustration style features cute characters with big heads, tiny bodies and adorably exaggerated facial expressions. Play with proportions to create highly stylized itty-bitty chibis or unusually tall ones, using their big eyes and giant personalities to convey animated emotions, from surprised and joyful to sad and mad.
• 32 step-by-step lessons cover everything from proportions and poses to clothing and digital coloring.
• Create every kind of chibi: boys, girls, pets, witches, fairies and anthropomorphic characters.
• Learn how to turn your friends, family and yourself into adorable chibis!
• Includes a chapter dedicated to making chibi crafts, such as phone cases, greeting cards and do-not-disturb signs.
Show everyone how awesome your chibis are!

Product Details
| ISBN-13: | 9781440340949 |
|---|---|
| Publisher: | Penguin Publishing Group |
| Publication date: | 03/20/2018 |
| Pages: | 128 |
| Sales rank: | 499,715 |
| Product dimensions: | 8.20(w) x 10.80(h) x 0.50(d) |
About the Author
Read an Excerpt
CHAPTER 1
HEY THERE, EVERYBODY! MY NAME'S MOCHY.
I'M GOING TO BE YOUR TOUR GUIDE AS YOU READ THIS BOOK.
NOW, SOME OF YOU MAY BE WONDERING, "WHAT EXACTLY IS A CHIBI?"
WELL, DON'T SWEAT IT. BECAUSE THERE'S A FULL EXPLANATION AT THE BEGINNING OF PART 1.
THE GUY WHO WROTE THIS BOOK LOVES EXPLAINING STUFF.
DRIVES ME A LITTLE CRAZY, TO BE HONEST.
DON'T TELL HIM I SAID THAT.
ANYWAY, IF YOU WANT TO LEARN HOW TO DRAW CHARACTERS LIKE ME ...
... YOU KNOW, WITH THE BIG HEADS AND THE TINY, LITTLE BODIES ...
... YOU'VE COME TO THE RIGHT PLACE.
THIS BOOK WILL TEACH YOU EVERYTHING YOU NEED TO KNOW ABOUT DRAWING CHIBIS.
BY THE TIME YOU GET TO THE LAST PAGE, YOU'LL BE TEACHING OTHER PEOPLE HOW TO DO IT.
SO READ ON AND ENJOY!
TRUST ME: CHIBIS ARE AWESOME.
AND I'M NOT JUST SAYING THAT BECAUSE I'M A CHIBI.
WHAT YOU NEED
Many aspiring artists worry too much about art supplies. There almost seems to be the belief that buying the right stuff is the single most important part of creating great art, but that's like thinking you'll be able to swim as fast as Olympic gold medalists do by wearing the right swimsuit. It doesn't work that way. What really matters is not the pencil but the brain of the person holding it. Experiment to find the size, styles and brands you like best. If it feels right to you, that's all that matters.
PAPER
I almost want to cry when I see that someone has put hours and hours of work into a drawing on a piece of loose-leaf notebook paper. Do yourself a favor and get a pad of smooth bristol. It's thick and sturdy and can hold up to repeated erasing.
PENCILS
Pencils come down to personal preference. Perfect for me may be too hard or soft for you. I like a simple no. 2 pencil (the kind we all grew up with), but there are pencils of all kinds of hardness and quality. Try some out to see what kind of marks they make. The softer the lead, the more it may smear.
PENS
Get a good permanent ink pen at an art store, one that won't fade or bleed over time. Don't confine yourself to superfine tips. Have a variety of pens with different tip widths for the various lines you need.
RULERS
Get yourself a nice clear plastic ruler so that you can see the art as you make lines. A 15-inch (38cm) ruler is good for even some of the longest lines.
KNEADED ERASERS
These big soft erasers, available in art stores, are great for erasing huge areas without leaving tons of pink dust behind. However, they aren't always precise, so feel free to use them in combination with a regular pencil eraser.
PENCIL SHARPENERS
I've come to prefer a simple handheld disposable sharpener over an electric one. You'll get the best use out of it while the blade is perfectly sharp.
PUTTING YOUR MATERIALS TO WORK:.
Drawing a Chibi Face
Let's begin with a little practice lesson. This will help you get used to the step-by-step teaching method I'll be using throughout this book. Your drawings don't need to be perfect. Just do your best and have fun with it!
1 Draw the Head Shape
Using a pencil, draw the shape of a chibi head. The top of the head is very much like a circle. The sides are straight lines, tilted inward just a bit, and the bottom curves gently to form the chin.
2 Add the Eyes and Mouth
Add the shapes of the eyes and mouth. Note that the eyes are very far from the top of the head. (This is true of almost all chibi drawings.) The eyes are oval-shaped but flattened a bit on the bottoms.
3 Draw the Eyebrows, Eyelashes and Ears
Draw eyebrows, upper eyelashes and ears. The eyelashes are quite thick. I've added a small circle in the top of each eye to make them appear shiny. Note how low the ears are on the head compared to the eyes.
4 Draw the Hair Online
Draw a basic outline of the hair that roughly follows the shape of the head. I've added details to the eyes: eyelid folds above each eyelash and a U-shaped line inside each iris to indicate the pupil.
5 Add the Hair Details
Almost done! Just add a series of V-shaped lines to serve as her bangs. Note that they all point in slightly different directions, curving across the shape of the forehead.
6 Ink All the Lines
Take your pen and ink all the lines. Allow plenty of time for the ink to dry, then erase all the penciled guidelines. Congratulations! You've drawn a chibi head, and you're ready to move on to the next lesson.
PART 1 Chibi Basics
Chibis have a more lighthearted spirit to them than other manga characters, and I believe the process of learning how to draw them should be similarly lighthearted. Rather than sweating over lessons on anatomy and perspective, why not just hop straight into drawing chibis in all their hypercute glory? The ten lessons in this first chapter will allow you to do just that.
NOW, A LOT OF PEOPLE WHO TEACH ART GET REALLY HUNG UP ON RULES.
THEY'RE LIKE, "YOU'VE GOTTA DO THIS."
"YOU CAN'T DO THAT."
WELL, AS FAR AS I'M CONCERNED, THERE'S ONLY ONE RULE WHEN IT COMES TO DRAWING CHIBIS.
HAVE FUN.
THIS CHAPTER IS FILLED WITH LESSONS ON HOW TO DRAW CHIBIS ...
... ALL OF THEM SHOWING EVERY SINGLE STEP IN THE PROCESS.
BUT THAT DOESN'T MEAN YOUR DRAWINGS NEED TO LOOK EXACTLY LIKE THE ONES IN THIS BOOK.
CHANGE THINGS UP.
DO IT YOUR WAY.
AND AS FOR THE SO-CALLED RULES ...
... I SAY JUST CHUCK 'EM OUT THE WINDOW!
I MEAN, EXCEPT FOR THE "HAVE FUN" RULE.
I LIKE THAT RULE.
CHIBIS: AN INTRODUCTION
The Japanese word chibi is really just an all-purpose slang word meaning "short person," and in Japan its usage is by no means confined to cartooning. But outside of Japan, the word is mostly used to describe a particular Japanese cartooning style: one in which characters are drawn with large heads, tiny bodies and-very often-greatly exaggerated facial expressions.
Within the world of manga storytelling, characters are often drawn in two different ways within the same story. Most of the time they are seen in their standard form with fairly believable body proportions. But at key moments, for a comical effect, they may briefly morph into their giant-headed chibi form. These sudden transformations allow manga artists to make a moment of anger, for example, much cuter and more lighthearted than it would be if standard body proportions were maintained. That said, many chibis you see these days aren't part of any story. They are stand-alone illustrations of chibi characters, often doing nothing more than striking a pose against a white background. So, if you're not working on an epic manga story at the moment, not to worry. This book is for people who simply want to draw chibis for the sheer pleasure of it.
CHIBI PROPORTIONS.....................................................
Compare these two illustrations to gain a sense of how standard manga proportions differ from chibi proportions. This will help you get the basic idea before we jump into our first big drawing lesson.
Curious about how to draw a real person as a chibi? Sit tight. There's a lesson about that coming up in Part 3.
.: CHIBI BASICS :.
Basic Chibi Girl
Every artist should find his own method of drawing chibi proportions. For some, an exaggerated cartoony approach is ideal: gigantic heads with tiny little bodies. Others prefer chibis that appear quite tall and elegant. For our first full step-by-step lesson, I thought it would be best to go for something between the two extremes.
Let's begin with a female character that is a little more than two heads tall. In later lessons we'll learn interesting poses, but for now let's stick with a chibi who's just standing there. This will help us focus on the length of the arms and legs compared to the rest of the body.
1 Draw the Head Shape and Eyes
Draw a head shape that is considerably taller than it is wide. Make the top of the head round with contour lines that straighten out as they descend to the cheeks. The large oval eye shapes are widely spaced and low on the face. The upper two-thirds of the head is almost all blank space. Add a short line for the mouth.
2 Add the Hair Contour and Eye Details
Place a curving line just above the circle of the scalp to serve as the contour line of the hair. Down near the cheeks add simple C-shaped lines for the ears. Draw eyebrows and then eyelash lines above and below the irises. Add ovals on one side of each iris for highlights and U-shaped lines for the pupils.
3 Draw the Hair and Facial Details
For the hairstyle, place a curving vertical line across the left side of the forehead, dividing the hair into two large sections. The strands of hair are curving V shapes, drawn with lines that follow the surface of the scalp. Add short diagonal lines to convey the structure of each ear, and little horizontal lines above each eyelash for the eyelid folds.
4 Draw the Torso
Draw two short lines for the neck, then draw the contours of the arms, taking care to focus on both the width and the length. They are roughly as long from shoulder to wrist as the head is from side to side. When drawing the waist area, take care to make the distance of its widest point (the area of the upper thighs) about the same as the width of the shoulders.
5 Draw the Legs
Now draw lines for the contours of the legs. The length of each leg from the top of the thigh to the tip of the toe is similar in length to the arms from shoulder to wrist. Chibi feet often have very little detail. In this case, I drew a small notch to suggest the big toe and left it at that.
6 Add Clothing Details, Hands and Kneecaps
This lesson is all about body proportions, not clothing, so there's no need to replicate the garment choice I've made. Indeed, why not have fun and come up with clothing all your own? When drawing the hands, pay attention to their small size relative to the arm. I've added little vertical dashes on each leg to convey the kneecaps.
7 Ink the Drawing
Grab your favorite pen and ink all the lines. Leave time for the ink to dry, then erase all the pencil work. Congratulations! You've drawn a cute little chibi character of average proportions, head to toe.
.: CHIBI BASICS :.
Basic Chibi Boy
The approach to drawing body proportions doesn't really change when you go from drawing a female chibi to drawing a male. If you've made your female character two and one half heads tall, you can make your male character exactly the same height.
But you may use quite a different approach to drawing the body shape. In this lesson, you'll learn how to draw a basic chibi boy with a body shape that reads as male rather than female, even at a quick glance.
1 Draw the Head Shape and Eyes
Just as with the female character, the head shape is taller than wide, rounded at the top, and has contour lines that straighten out as they descend to the cheeks. I made the eyes a little smaller than I did for the female version-a common method of conveying masculinity. Add a short line for the mouth.
2 Add the Hair Contour and Eye Details
Place the hair contour just above the line of the scalp, adding a loose strand or two. The ears are simple C-shaped lines, down near the cheeks. Give a mischievous tilt to the eyebrows, then add eyelash lines that are much less bold than in the female version. Draw ovals on one side of each iris for highlights, and U-shaped lines for the pupils.
3 Add Hair and Facial Details
For the hairstyle, part the hair on the left side of the head, dividing the hair into two large sections. The strands of hair are curving V shapes, and many of them sweep diagonally across the forehead. Add short diagonal lines to convey the structure of each ear, and little horizontal lines above each eyelash for the folds of the eyelids.
4 Draw the Torso
Draw two short lines for the neck, then draw the shoulders. Note that the shoulders are much wider than in the female version, and they angle more sharply at the edges. When drawing the waist, pay attention to the subtle angle of the contour lines in that area. As in the female version, the arms are roughly as long shoulder to wrist as the head is from side to side.
5 Draw the Legs
Now draw lines for the contours of the legs. Compared to the female version, the contours of the thighs are straighter with considerably less width between the lines. Draw the feet the same as in the female version with just a small notch to delineate the big toe.
6 Add Clothing Details, Hands and Kneecaps
Have fun designing your own clothing choices. Horizontal lines at the waist can help to convey wrinkles in that area. When drawing the hands, feel free to simplify things. Many artists drawing chibis make no effort to separate the fingers. As in the female version, I've added little vertical dashes on each leg to convey the kneecaps.
7 Ink the Drawing
Get your pen and ink all the lines. Allow time for the ink to dry, then erase all the pencil work. Nicely done! You've learned the key differences between drawing standard chibi male and female body shapes.
.: CHIBI BASICS :.
Super Short Chibi Girl
Now that we've looked at the proportions for an average chibi character, let's try drawing in a style that's more extreme. In the previous lessons the characters were a little more than two heads tall. But sometimes artists make the head so big that it's larger than the rest of the entire body. The result is a highly stylized super short chibi-an approach that goes all in and pushes the chibi look to its limits.
As before, let's stick with a "just standing there" pose so as to focus on the proportions. And fair warning: You just might get hooked on this drawing method. For some artists, it becomes the only way to chibi!
1 Draw the Head Shape and Eyes
Begin by drawing the basic shape of the head. It is taller than it is wide but only by a small margin. Unlike in the previous lessons, the bottom is quite flat, with no point at the chin. The oval eyes are large with about one eye's width of space between them. They are low on the head but not as low as in earlier lessons.
2 Add the Hair Contour and Eye Details
Place a curving line just above the line of the scalp to serve as the contour of the hair. Add a thick line above each iris to indicate the eyelashes. You can add a lower eyelash line if you like, or skip it, as I have done. I gave this character pigtails, but feel free to draw any hairstyle you like.
3 Draw the Bangs
Elsewhere in this book you will find me giving characters complex hairstyles, but here the look is deliberately flat. It's kind of a "symbol" of hair rather than the real thing. Nevertheless, I have tried to make the lines follow the curving surface of the scalp in a way that looks natural.
4 Draw the Pigtails and Add Facial Details
Divide the pigtails into a few simple V-shaped strands to make them look more like hair. Draw a hooked line on each ear to add structure, and add a short line above each eye to indicate the folds of the eyelids.
5 Draw the Torso
When drawing the upper body, pay attention to its small size in comparison to the head. The shape you're adding in this step is only just a little larger, top to bottom, than one of the eyes. The arms and the neck are of roughly equal width.
6 Add Legs, Hands and Clothing Details
Now draw the legs, making them around the same length as the arms, but considerably wider, especially at the thighs. Feel free to simplify the hands if you're having trouble with them. No need to make the clothes exactly as I have. Go ahead and make your own.
7 Ink the Drawing
Get your pen and ink all the lines. Then allow time for the ink to dry before erasing all the pencil work. Well done! You've learned how to draw a super short female chibi. In the next lesson, you'll learn the male version.
(Continues…)
Excerpted from "Chibi!"
by .
Copyright © 2018 Mark Crilley.
Excerpted by permission of F+W Media, Inc..
All rights reserved. No part of this excerpt may be reproduced or reprinted without permission in writing from the publisher.
Excerpts are provided by Dial-A-Book Inc. solely for the personal use of visitors to this web site.
Table of Contents
What You Need, 6,
Drawing a Chibi Face, 7,
Part 1 CHIBI BASICS, 8,
Chibis: An Introduction,
Basic Chibi Girl,
Basic Chibi Boy,
Super Short Chibi Girl,
Super Short Chibi Boy,
Tall Chibi Girl,
Tall Chibi Boy,
Chibi Hairstyles,
Chibi Hair Proportions,
Surprised Chibi,
Joyful Chibi,
Sad Chibi,
Angry Chibi,
Emotion Symbols in Manga,
Part 2 CHARACTERS AND POSES, 36,
Same Pose, Different Character,
Running Chibi,
Line Quality,
Action Pose,
Chibi Feet: Big or Small?,
Kissing Pose,
Romantic Chibi Poses,
Witch Chibi,
Drawing Braids,
Panda Girl Chibi,
Anatomy of a Chibi Eye,
Fox Boy Chibi,
Adding Animal Features,
Clothing Wrinkles,
Clothing Through the Seasons,
Accessories,
Simplifying Objects,
Chibi Dog,
Chibi Cat,
Chibi Robot,
Unconventional Chibi Style,
Fantasy Chibis,
Part 3 CHIBI CRAFT PROJECTS, 78,
Custom Chibi Gear,
Chibi Flower Card,
Design Your Own Chibi Cards,
Do Not Disturb Sign,
Chibis on Signs,
T-Shirt Designs,
Black T-Shirts,
Printed Stickers,
Making Stickers at Home,
Customized Buttons,
Using Chibis to Promote an Event,
Rubber Stamps,
Designing a Rubber Stamp,
Turning a Real Person Into a Chibi,
Chibi Versions of Famous Characters,
Personalizing a Phone Case,
Personalized Luggage Tag,
Pop-Up Chibi,
Completing Your Pop-Up Chibi,
Chibi Calendar,
Making Your Own Calendar,
Adding Color to Your Chibis,
Digital Coloring,
Index, 125,
About the Author, 126,
Dedication, 126,
Related Subjects
Customer Reviews
Explore More Items


")


")


")

