


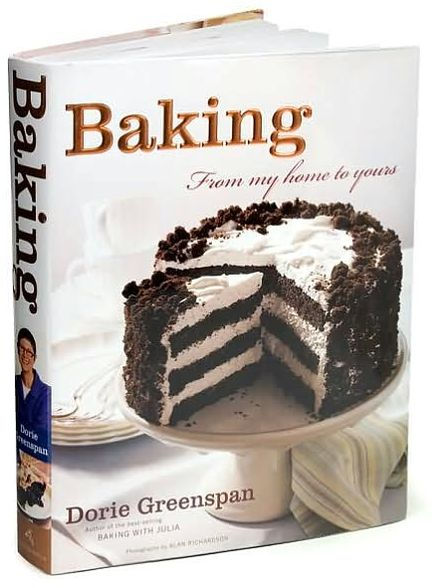
Hardcover
-
PICK UP IN STORECheck Availability at Nearby Stores
Available within 2 business hours
Related collections and offers
Overview
Even the most homey of the recipes are very special. Dorie’s favorite raisin swirl bread. Big spicy muffins from her stint as a baker in a famous New York City restaurant. French chocolate brownies (a Parisian pastry chef begged for the recipe). A dramatic black and white cake for a “wow” occasion. Pierre Hermé’s extraordinary lemon tart.
The generous helpings of background information, abundant stories, and hundreds of professional hints set Baking apart as a one-of-a-kind cookbook. And as if all of this weren’t more than enough, Dorie has appended a fascinating minibook, A Dessertmaker’s Glossary, with more than 100 entries, from why using one’s fingers is often best, to how to buy the finest butter, to how the bundt pan got its name.

Product Details
| ISBN-13: | 9780618443369 |
|---|---|
| Publisher: | HarperCollins |
| Publication date: | 11/01/2006 |
| Pages: | 528 |
| Sales rank: | 360,902 |
| Product dimensions: | 8.38(w) x 10.88(h) x (d) |
About the Author

Read an Excerpt
TOASTED ALMOND SCONES
THE TRIPLE-WHAMMY flavor hit here is almonds, almonds and almonds: toasted ground almonds and pure almond extract in the dough and sliced almonds on top.
1 cup blanched almonds (whole, slivered or sliced), toasted 2 tablespoons sugar 1 large egg 1/3 cup cold heavy cream 1/4 cup cold whole milk 1/8 teaspoon pure almond extract 13/4 cups all-purpose flour 1 tablespoon baking powder 1/4 teaspoon salt 1 stick (8 tablespoons) cold unsalted butter, cut into small pieces 1/4 cup sliced almonds (optional)
GETTING READY: Center a rack in the oven and preheat the oven to 400 degrees F. Line a baking sheet with parchment or a silicone mat.
Divide the toasted almonds in half. Finely grind 1⁄2 cup in a food processor or blender with the sugar, taking care not to overgrind the nuts and end up with almond butter. Finely chop the other 1⁄2 cup.
Stir the egg, cream, milk and almond extract together.
Whisk the flour, ground almonds and sugar, baking powder and salt together in a large bowl. Drop in the butter and, using your fingers, toss to coat the pieces of butter with flour. Quickly, working with your fingertips (my favorite method) or a pastry blender, cut and rub the butter into the dry ingredients until the mixture is pebbly. You’ll have pea-size pieces, pieces the size of oatmeal flakes and pieces the size of everything in between—and that’s just right.
Pour the liquid ingredients over the dry ingredients and stir with a fork just until the dough, which will be wet and sticky, comes together. Don’t overdo it. Stir in the chopped almonds.
Still in the bowl, gently knead the dough by hand, or turn it with a rubber spatula 8 to 10 times. Turn the dough out onto a lightly floured work surface and divide it in half. Working with one piece at a time, pat the dough into a rough circle that’s about 5 inches in diameter, cut it into 6 wedges and top each scone with a few sliced almonds, if you’re using them. Place them on the baking sheet. (At this point, the scones can be frozen on the baking sheet, then wrapped airtight. Don’t defrost before baking—just add about 2 minutes to the baking time.) Bake the scones for 20 to 22 minutes, or until their tops are golden and firmish. Transfer to a rack and cool for 10 minutes before serving, or wait for the scones to cool to room temperature.
QUINTUPLE CHOCOLATE BROWNIES
THERE’S A little of every kind of chocolate in these sweet, more-fudgy- thancakey brownies. Following tradition, the batter is made with unsweetened chocolate, but it’s got bittersweet (or semisweet) chocolate, cocoa, milk chocolate chips and a soft white chocolate glaze too. And there are nuts—any kind you’d like, but I hope you’ll try salted cashews or peanuts at least once.
FOR THE BROWNIES 1/2 cup all-purpose flour 1/4 cup unsweetened cocoa powder 1/2 teaspoon salt 1 stick (8 tablespoons) unsalted butter, cut into 8 pieces 3 ounces unsweetened chocolate, coarsely chopped 3 ounces bittersweet or semisweet chocolate, coarsely chopped 2 tablespoons strong coffee 1 cup sugar 3 large eggs 1 teaspoon pure vanilla extract 6 ounces premium-quality milk chocolate, chopped into chips, or 1 cup store- bought milk chocolate chips 1 cup chopped nuts
FOR THE GLAZE 6 ounces premium-quality white chocolate, finely chopped, or 1 cup store- bought white chocolate chips 1⁄3 cup heavy cream
GETTING READY: Center a rack in the oven and preheat the oven to 325 degrees F. Line a 9-inch square baking pan with foil, butter the foil and place the pan on a baking sheet. Sift together the flour, cocoa and salt.
TO MAKE THE BROWNIES : Set a heatproof bowl over a saucepan of simmering water and add, in the following order, the butter, the two chocolates and the coffee. Keeping the pan over low heat, warm just until the butter and chocolates are melted—you don’t want the ingredients to get so hot they separate, so keep an eye on the bowl. Stir gently, and when the mixture is smooth, set it aside for 5 minutes. Using a whisk or a rubber spatula, beat the sugar into the chocolate mixture. Don’t beat too vigorously—you don’t want to add air to the batter—and don’t be concerned about any graininess. Next, stir in the eggs one at time, followed by the vanilla. You should have a smooth, glossy batter. If you’re not already using a rubber spatula, switch to one now and gently stir in the dry ingredients, mixing only until they are incorporated. Finally, stir in the milk chocolate chips and the nuts. Scrape the batter into the pan.
Bake for about 35 minutes, or until a thin knife inserted into the center comes out streaked but not thickly coated. Transfer the pann to a cooling rack and let the brownies rest undisturbed for at least 30 minutes. (You can wait longer, if you’d like.) Turn the brownies out onto a rack, peel away the foil and pllace it undddder another rack—it will be the drip catcher for the glaze. Invert the brownies onto the rack and let cool completely.
TO MAKE THE GLAZE: Put the white chocolate in a heatproof bowl. Bring the heavy cream to a boil and pour it over the chocolate. Wait 30 seconds, then, using a rubber spatula, gently stir until the chocolate is melted and the glaze is smooth. Hold a long metal icing spatula in one hand and the bowl of glaze in the other. Pour the glaze onto the center of the brownies and use the spatula to nudge it evenly over the surface. Don’t worry if it dribbles over the edges, you can trim the sides later (or not). Refrigerate the brownies for about 20 minutes to dry the glaze. Cut into 16 squares, each roughly 21⁄4 inches on a side.
MAKES 16 BROWNIES
SERVING: Serve straight up— whipped cream or ice cream is unnecessary with these. Well, a little ice cream is nice—why not?
STORING: The brownies can be put back in their baking pan, wrapped (without touching the glaze) and kept at room temperature for about 3 days or frozen—glaze and all—for up to 2 months.
CINNAMON SQUARES
THIS IS a simple cake in every way. You mix it in minutes by hand and bake it in an ordinary square pan (I use a nonstick Baker’s Secret pan from the supermarket), first spreading half of the cinnamon batter into the pan, adding chocolate bits and a mixture of cinnamon, sugar and instant espresso, then the rest of the batter. The cake gets a delicious and equally simple frosting, a melt of chocolate and butter. It’s pretty enough in a homey way, but there’s something about the softness of the cake, the warmth of its cinnamon flavor, the way the swirl of cinnamon, sugar, chocolate and coffee melts into the cake and that really good frosting that makes it as good at a brunch as it is as a midnight snack.
For the cake 11/4 cups plus 2 tablespoons sugar 1 tablespoon plus 2 1/2 teaspoons ground cinnamon 11/2 teaspoons instant espresso powder 1 3/4 cups all-purpose flour 2 teaspoons baking powder Pinch of salt 3/4 cup whole milk 2 large eggs 1/2 teaspoon pure vanilla extract 1 stick plus 2 tablespoons (10 tablespoons) unsalted butter, melted and cooled 3 ounces bittersweet chocolate, finely chopped, or 1/2 cup store-bought mini chocolate chips
For the frosting 6 ounces bittersweet chocolate, finely chopped 21/2 tablespoons unsalted butter, cut into 4 pieces
GETTING READY: Center a rack in the oven and preheat the oven to 350 degrees F. Butter an 8-inch square baking pan and line the bottom with parchment or wax paper. Place the pan on a baking sheet.
TO MAKE THE CAKE : Stir 2 tablespoons of the sugar, 21/2 teaspoons of the cinnamon and the espresso together in a small bowl.
In a large bowl, whisk together the flour, the remaining 11/4 cups sugar, the baking powder, salt and the remaining 1 tablespoon cinnamon. In another bowl, whisk together the milk, eggs and vanilla. Pour the liquid ingredients over the flour mixture and gently whisk until you have a homogenous batter. Now, using the whisk or a rubber spatula, fold in the butter with a light touch, just until the butter is absorbed. You’ll have a smooth, satiny batter.
Scrape half of the batter into the pan and smooth the top. Sprinkle the chocolate over the batter and dust with the cinnamon-sugar mixture. Cover with the rest of the batter and smooth the top again.
Bake for 35 to 40 minutes, or until the cake is puffed and beginning to pull away from the sides of the pan; a thin knife inserted into the center will come out clean. Transfer the cake to a cooling rack and let it rest for 15 minutes before unmolding it onto another rack. Peel off the paper, invert it onto the first rack, and cool to room temperature right side up.
TO MAKE THE FROSTING : Put the chocolate and butter in a heatproof bowl and fit the bowl over a saucepan of simmering water. Cook, stirring gently and often, just until they melt. Be careful not to overheat the mixture so much that it thins out; the chocolate should be smooth, very shiny, thick and spreadable. (If it thins, leave the frosting at room temperature for a bit, until it thickens a little.) Using an offset metal icing spatula or a table knife, spread the frosting in generous sweeps and swirls over the top of the cake. Allow the frosting to set at room temperature, then cut the cake into 9 squares, each about 21/2 inches on a side.
MAKES 9 servings
SERVING: Serve the cake as is or, if you’d like, with whipped cream, crcme fraîche or sour cream.
StTORING: Wrapped in plastic, the cake will keep at room temperature for 2 days. It can be frozen for up to 2 months, but it’s best to put the cake in the freezer unwrapped and then, when the frosting is firm, to wrap it airtight; defrost, still wrapped, overnight in the refrigerator.
PLAYING AROUND CAPPUCCINO SQUARES: If you like the cappuccino flavor combination of coffee and cinnamon, you can easily switch the balance in this recipe by adding a jolt of coffee flavor to the batter. Just mix 1 tablespoon instant espresso into the milk and warm the milk in a microwave oven until it is hot enough to dissolve the coffee. Cool the milk and carry on.
THE MOST EXTRAORDINARY FRENCH LEMON CREAM TART
THE FILLING in this tart is everything. It is the lemon cream I learned to make from Pierre Hermé, And it is the ne plus ultra of the lemon world. The tart is basic—a great crust, velvety lemon cream—and profoundly satisfying. It is also profoundly play-aroundable. You can add a fruit topping (circlets of fresh raspberries are spectacular with this tart) or a layer of fruit at the bottom; you can finish the tart with meringue; or you can serve it with anything from whipped cream to raspberry coulis.
1 cup sugar Grated zest of 3 lemons 4 large eggs 3⁄4 cup fresh lemon juice (from 4–5 lemons) 2 sticks plus 5 tablespoons (10 1⁄2 ounces) unsalted butter, cut into tablespoon-size pieces, at room temperature 1 9-inch tart shell made with Sweet Tart Dough (page 444), Sweet Tart Dough with Nuts (page 444) or Spiced Tart Dough (page 447), fully baked and cooled
GETTING READY : Have an instant-read thermometer, a strainer and a blender (first choice) or food processor at hand. Bring a few inches of water to a simmer in a saucepan.
Put the sugar and zest in a large heatproof bowl that can be set over the pan of simmering water. Off the heat, rub the sugar and zest together between your fingers until the sugar is moist, grainy and very aromatic. Whisk in the eggs, followed by the lemon juice.
Set the bowl over the pan and start stirring with the whisk as soon as the mixture feels tepid to the touch. Cook the lemon cream until it reaches 180 degrees F. As you whisk—you must whisk constantly to keep the eggs from scrambling— you’ll see that the cream will start out light and foamy, then the bubbles will get bigger, and then, as it gets closer to 180 degrees F, it will start to thicken and the whisk will leave tracks. Heads up at this point—the tracks mean the cream is almost ready. Don’t stop whisking or checking the temperature, and have patience— depending on how much heat you’re giving the cream, getting to temp can take as long as 10 minutes.
As soon as it reaches 180 degrees F, remove the cream from the heat and strain it into the container of the blender (or food processor); discard the zest. Let the cream stand, stirring occasionally, until it cools to 140 degrees F, about 10 minutes.
Turn the blender to high (or turn on the processor) and, with the machine going, add the butter about 5 pieces at a time. Scrape down the sides of the container as needed as you incorporate the butter. Once the butter is in, keep the machine going—to get the perfect light, airy texture of lemon-cream dreams, you must continue to blend the cream for another 3 minutes. If your machine protests and gets a bit too hot, work in 1-minute intervals, giving the machine a little rest between beats.
Pour the cream into a container, press a piece of plastic wrap against the surface to create an airtight seal and refrigerate for at least 4 hours or overnight. (The cream will keep in the fridge for 4 days or, tightly sealed, in the freezer for up to 2 months; thaw it overnight in the refrigerator.) When you are ready to assemble the tart, just whisk the cream to loosen it and spoon it into the tart shell. Serve the tart, or refrigerate until needed.
MAKES 8 SERVINGS
SERVING: It’s a particular pleasure to have this tart when the cream is cold and the crust is at room temperature. A raspberry (page 467) or other fruit coulis is nice, but not necessary; so is a little crcme fraîche. I know it sounds odd to offer something as rich as crcme fraîche with a tart like this, but it works—because the lemon cream is so light and so intensely citric, it doesn’t taste or feel rich.
STORING: While you can make the lemon cream ahead, once the tart is constructed, it’s best to eat it the day it is made.
SWEET TART DOUGH
IN FRENCH, this dough is called pâte sablée because it is buttery, tender and sandy (that’s what sablée means). It’s much like shortbread, and it’s ideal for filling with fruit, custard or chocolate.
The simplest way to make a tart shell with this dough is to press it into the pan. You can roll out the dough, but the high proportion of butter to flour and the inclusion of confectioners’ sugar makes it finicky to roll. I always press it into the pan, but if you want to roll it, I suggest you do so between sheets of plastic wrap or wax paper or inside a rolling slipcover (see page 491).
11⁄2 cups all-purpose flour 1⁄2 cup confectioners’ sugar 1⁄4 teaspoon salt 1 stick plus 1 tablespoon (9 tablespoons) very cold (or frozen) unsalted butter, cut into small pieces 1 large egg yolk
Put the flour, confectioners’ sugar and salt in a food processor and pulse a couple of times to combine. Scatter the pieces of butter over the dry ingredients and pulse until the butter is coarsely cut in—you should have some pieces the size of oatmeal flakes and some the size of peas. Stir the yolk, just to break it up, and add it a little at a time, pulsing after each addition. When the egg is in, process in long pulses— about 10 seconds each—until the dough, which will look granular soon after the egg is added, forms clumps and curds. Just before you reach this stage, the sound of the machine working the dough will change—heads up. Turn the dough out onto a work surface and, very lightly and sparingly, knead the dough just to incorporate any dry ingredients that might have escaped mixing.
TO PRESS THE DOUGH INTO THE PA N : Butter a 9-inch fluted tart pan with a removable bottom. Press the dough evenly over the bottom and up the sides of the pan, using all but one little piece of dough, which you should save in the refrigerator to patch any cracks after the crust is baked. Don’t be too heavy-handed—press the crust in so that the edges of the pieces cling to one another, but not so hard that the crust loses its crumbly texture. Freeze the crust for at least 30 minutes, preferably longer, before baking.
TO PARTIALLY OR FULLY BAKE THE CRUST: Center a rack in the oven and preheat the oven to 375 degrees F.
Butter the shiny side of a piece of aluminum foil and fit the foil, buttered side down, tightly against the crust. (Since you froze the crust, you can bake it without weights.) Put the tart pan on a baking sheet and bake the crust for 25 minutes. Carefully remove the foil. If the crust has puffed, press it down gently with the back of a spoon. For a partially baked crust, patch the crust if necessary, then transfer the crust to a cooling rack (keep it in its pan).
TO FULLY BAKE THE CRUST: Bake for another 8 minutes or so, or until it is firm and golden brown. (I dislike lightly baked crusts, so I often keep the crust in the oven just a little longer. If you do that, just make sure to keep a close eye on the crust’s progress—it can go from golden to way too dark in a flash.) Transfer the tart pan to a rack and cool the crust to room temperature before filling.
TO PATCH A PARTIALLY OR FULLY BAKED CRUST, IF NECSSARY: If there are any cracks in the baked crust, patch them with some of the reserved raw dough as soon as you remove the foil. Slice off a thin piece of the dough, place it over the crack, moisten the edges and very gently smooth the edges into the baked crust. If the tart will not be baked again with its filling, bake for another 2 minutes or so, just to take the rawness off the patch.
MAKES ENOUGH FOR ONE 9-INCH CRUST STORING: Well wrapped, the dough can be kept in the refrigerator for up to 5 days or frozen for up to 2 months. While the fully baked crust can be packed airtight and frozen for up to 2 months, I prefer to freeze the unbaked crust in the pan and bake it directly from the freezer—it has a fresher flavor. Just add about 5 minutes to the baking time.
PLAYING AROUND SWEET TART DOUGH WITH NUTS: This dough has a slightly more assertive flavor than Sweet Tart Dough, but you can use the two interchangeably. For the nut dough, reduce the amount of flour to 11⁄4 cups and add 1⁄4 cup finely ground almonds (or walnuts, pecans or pistachios).
Copyright © 2006 by Dorie Greenspan. Reprinted by permission of Houghton Mifflin Company.
Table of Contents
Introduction · xii BREAKFAST SWEETS · 1 A CACHE OF COOKIES · 65 CAKES OF ALL KINDS · 177 PIES AND TART S Warm and Cold, Fruity and Nutty, Creamy and Crunchy · 297 SPOON DESSERT S Puddings, Custards, Crisps and Ice Creams · 381 INDISPENSABLES Base Recipes · 439 A Dessert Maker’s Glossary of Ingredients, Tools and Techniques · 473 Index · 497Related Subjects
Customer Reviews
Explore More Items


")
")
")


")

