


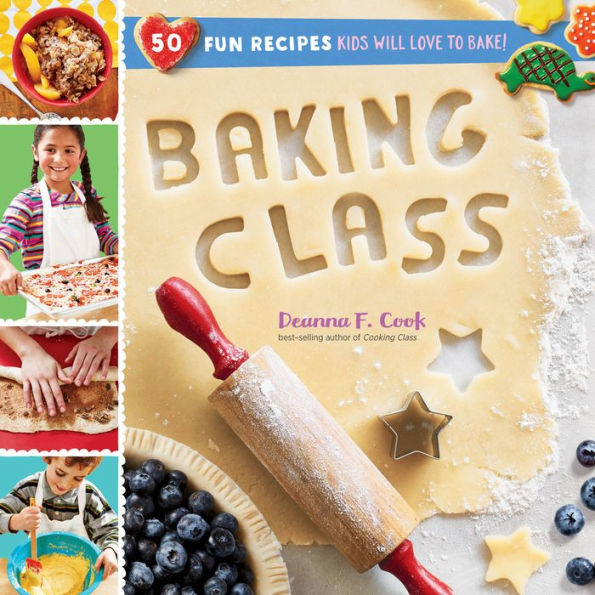
eBook
Related collections and offers
Overview
2017 NPR's Best Books of the Year
2017 IACP Cookbook Award Winner
2017 National Parenting Product Awards Winner
2018 Mom's Choice Award Gold Winner
2019 New York Times "Best Cookbooks for Kids"
Also available in this series: Cooking Class and Cooking Class Global Feast!

Product Details
| ISBN-13: | 9781612128566 |
|---|---|
| Publisher: | Storey Books |
| Publication date: | 09/05/2017 |
| Series: | Cooking Class |
| Sold by: | Hachette Digital, Inc. |
| Format: | eBook |
| Pages: | 144 |
| Sales rank: | 420,931 |
| File size: | 42 MB |
| Note: | This product may take a few minutes to download. |
| Age Range: | 8 - 12 Years |
About the Author
Read an Excerpt
CHAPTER 1
Welcome to Baking Class!
Grab your apron and follow these tips and tricks for kitchen fun!
Recipe Ratings
Each recipe is rated with one, two, or three rolling pins so you know the skill level needed to complete it. If you are a new chef, you can start with the easier recipes and work your way up.
ONE ROLLING PIN
Most of these recipes are "no-bake" and can be pulled together without having to use the oven.
TWO ROLLING PIN
These recipes involve baking in the oven or toaster oven, so brush up on your oven safety skills before you begin. These are good recipes to work on with a parent or older sibling.
THREE ROLLING PIN
These recipes involve cutting with sharp knives, using an electric mixer or food processor, and using the oven. They tend to take more time to prepare, too.
LESSON #1
BAKE LIKE A PRO!
Start good habits from the get-go by following these basic kitchen rules. To begin with, ask an adult for permission before using the kitchen. Ask for help, too, if you have questions along the way.
1. Wash your hands with warm water and soap before you handle food.
2. Roll up long sleeves & wear an apron. Tie back long hair to keep it away from food. You can even wear a bandanna or chef's hat!
3. Read the recipe from start to finish before you begin. Follow the steps closely.
4. Put out all the ingredients you'll need (see the Here's What You Need list) to be sure you have everything.
5. Start each recipe with ingredients that are at room temperature. And be sure to check expiration dates (don't use baking soda or perishables if they are past their dates).
6. Take out all the tools you need for your recipe from measuring cups to bowls.
7. Measure carefully (see the tips in Lesson 5: Measure Carefully).
8. Always use pot holders when moving pans in and out of the oven, and remember to turn the oven off after you're done baking.
9. Arrange your oven racks. Cookies, cakes, and breads bake most evenly in the middle of the oven. So before you preheat, arrange the oven racks so that one is in the center.
10. Preheat. Let the oven come to the correct temperature before you put in your pans or cookie trays. Otherwise, your food will take longer to bake or will cook unevenly.
11. Leave the oven door shut. The temperature drops every time the door is opened, so don't keep opening it to check your food. If your oven has a light, use it to keep an eye on your baked goodies.
12. Use a timer. Always set a timer, and don't leave the room when your cookies and pies are baking. Trust your sense of smell. If you smell burning, turn off the oven and take your food out, even if the timer hasn't gone off. Ovens heat at different rates, and no one wants burned baked goods!
13. Leave the kitchen sparkling clean! Put away the ingredients, wipe down the countertop, and wash the dishes.
LESSON #2
GATHER UP THE RIGHT TOOLS
To make the recipes in this book, you'll need some basic baking tools, such as cookie sheets, dry and liquid measuring cups, mixing spoons, and pot holders. You can put together a personal baking kit with your favorite tools and cookie cutters. Just find a big cardboard box or clear plastic container and stock it with your favorite baking tools. Label or decorate your container with the stickers in the back of the book.
BAKING KIT TOOLS
1. Mixing bowls
2. Ramekins
3. Rolling pin
4. Cake decorating kit (with disposable pastry bags and basic icing tips)
5. Pastry Wheel
6. Pizza Wheel
7. Measuring spoons
8. Pastry Cutter
9. Whisk
10. Apron
MORE BAKING KIT TOOLS
1. Liquid Measuring Cup
2. Dry Measuring Cup
3. Loaf pans
4. Cookie cutters
5. Metal spatula
6. Pie dish
7. Muffin pan
8. Paper Liners
9. Cookie sheet or Sheet pan and parchment paper
10. Cake pans
11. Pastry Brush
12. Icing spatula
13. Rubber spatula
14. Cooling rack
15. Pot holder
LESSON #3
STOCK UP ON BAKERY BASICS
Look through the recipes in the book, then make a list of the ingredients you need to make a few of them. If you plan to bake often, it's a good idea to stock up on some of the basics listed below. With the right ingredients in your cupboard, you'll have everything you need to bake up a storm any time you get a craving for cookies!
BAKERY BASICS
1. Flour (whole wheat, white, or gluten-free)
2. Vegetable Oil
3. Butter
4. Cocoa powder
5. Cinnamon
6. Powdered Sugar
7. Vanilla extract
8. White Sugar
9. Brown Sugar
10. Honey
11. Yeast
12. Fresh eggs
13. Molasses
14. Baking Powder (and Baking Soda)
15. Salt
16. Oats
17. Cornmeal
MORE BAKERY BASICS
1. Blueberries 2. Strawberries 3. Shredded coconut 4. Nuts 5. Grated carrot 6. Apples 7. Bananas 8. Lemons 9. Chocolate chips 10. Candy eyes 11. Sugar sprinkles 12. Colored nonpareils 13. Food coloring 14. Rainbow sprinkles 15. Dried fruit (raisins, dried cranberries)
LESSON #4
BAKING VOCABULARY
Many of the recipes in this book call for some basic prep work, such as melting butter or crushing graham crackers, before you start the other steps. Read the ingredients list and directions all the way through to find out what you need to do before you start baking. Here are some words you'll see in recipes:
Stir. To mix rapidly with a spoon, whisk, spatula, or electric mixer until smooth.
Cream. To mix butter and sugar together with an electric mixer until it turns fluffy. This adds air to your batter, which helps your baked goods rise.
Whisk. To combine ingredients with a whisk. You can whisk dry ingredients, like flour and baking powder, or wet ingredients, like eggs and milk.
Mix. To use a spoon or electric mixer to combine ingredients evenly. Use a bowl that is big enough to hold everything with extra room for the mixing activity.
Process. To mix ingredients in a food processor. Read the machine manual, and ask an adult for help when using a food processor for the first time. (See Lesson 6: Kitchen Safety.)
Grease the pan. To rub butter or vegetable oil (or use baking spray) on baking pans so food won't stick. Don't forget the sides and corners of the pan!
Grease and lightly flour. Once you've greased your pan, add a tablespoon of flour. Tap all sides to lightly flour the entire surface.
Line with parchment. To lay a sheet of parchment paper on your pan, which will keep cookies and breads from sticking to them.
Knead. To fold the dough in half, press with your palms, then turn and fold again. This makes your scones and breads light and airy by developing the gluten.
Melt. To turn a solid into a liquid by applying heat. You can melt butter or chocolate in a saucepan over low heat or in a bowl in a microwave for 10 to 20 seconds at a time.
Brush. To paint melted butter or egg wash on dough or bread with a pastry brush.
Sift. To process flour and other dry ingredients through a sieve or sifter to break up any clumps. Most flour you buy in the store is presifted, but if your baking powder or baking soda looks lumpy, you might want to sift it with the flour to mix it all together.
Add dry ingredients. To add a mixture of flour and other dry ingredients to a batter. If you're using a stand mixer, you can prevent the flour from flying around the kitchen by carefully holding a dishtowel around the bowl, keeping fingers out of the way.
Cut in the butter. To use a special pastry cutter, or two forks, to combine butter or shortening with dry ingredients until crumbly.
Roll out. To flatten out dough with a rolling pin. Rolling between two pieces of plastic wrap or waxed paper prevents sticking. You won't need to add extra flour, which can make your baked goods taste less buttery.
Cut with cookie cutters. To cut into shapes using cookie cutters. Use the sharper side to press into the dough. Cold dough is easiest to cut. If it sticks to the cutters, dip them in a little flour.
Cut with a Wheel. To cut dough or piecrust with a pastry wheel or a pizza wheel. The pastry wheel makes a zigzag pattern. The pizza wheel makes a straight line.
Crimp. To pinch the edges of a dough into a decorative pattern, or to press two edges of dough together to seal them.
Grate. To shred ingredients, such as carrots or zucchini, against a grater. When the food you're grating gets really small, stop grating to protect your fingers. Grating citrus rind is called zesting. (Note: you can also use a cool tool called a zester to grate the rind.)
Scoop. To make drop cookies or fill muffin pans using an ice cream scoop. It's less messy than using a spoon, and the cookies, muffins, and cupcakes will come out evenly shaped.
Scrape with a Spatula. To get every last bit of batter out of the mixing bowl with a rubber spatula.
Test for doneness. To check to see if your baked goods are finished baking.
Cool. To let your baked goods cool down after baking. Some baked goods you can eat right away, but others need to cool in the pan or on a rack. Follow the recipe instructions.
LESSON #5
MEASURE CAREFULLY
When following a recipe, it's important to measure the ingredients carefully. Here are some tips.
Liquid ingredients. Measure larger amounts of milk, water, and other liquids in a glass or plastic liquid measuring cup. Pour the liquid into the cup and read the measure from eye level.
For smaller measures, like a teaspoon, use measuring spoons. Work over a small bowl to catch any spills.
Dry ingredients. It's important to measure flour, sugar, and other dry ingredients with dry measuring cups or measuring spoons that can be leveled off. Fill the cup or spoon with the ingredient, and then run the flat part of a butter knife across it to get an exact measure.
Butter. Follow the measurement marks on the butter package. Find the line for the correct measurement, and then carefully cut straight down on the stick through the paper. Unwrap the portion you need and add it to your recipe.
Equivalents & Conversions
Here's a handy chart to help you convert recipe measurements.
1 teaspoon = 5 milliliters
1 tablespoon = 3 teaspoons (or ½ fluid ounce) = 15 milliliters
¼ = 4 tablespoons = 60 milliliters
½ = 4 ounces = 120 milliliters
1 cup = 8 ounces = 240 milliliters
1 pint = 2 cups = 16 ounces = 475 milliliters
1 quart = 2 pints = 0.95 liters
LESSON #6
KITCHEN SAFETY
Many of the recipes in this book require that you keep safety measures in mind, especially when you use sharp knives, an electric mixer, or a hot oven. It's important to work safely in the kitchen, so here are some tips.
Knives & graters. Make sure your knife is sharpened properly (dull knives are more dangerous because they can slip while you're cutting), and hold it firmly, with your fingers out of the way of the blade. Always cut with the blade moving away from your hand.
When you use a grater, watch out that you don't accidentally scrape the tip of your finger or your knuckles. That can hurt a lot! Dry your hands when cutting and grating — wet hands are slippery!
Mixers and food processors. Keep your fingers out of the way of the beaters when working with an electric mixer.
With a food processor, be especially careful when you are fitting the blades into the machine or taking them out to be washed. Never try to operate a food processor with the lid off, and of course, never stick a spoon or spatula into the bowl without turning the machine completely off first.
Microwave. Different microwave ovens have different directions, so ask an adult to show you how to use yours. Never use metal or aluminum foil in the microwave. Always use microwave-safe dishes. Glass, paper towels, and some plastic containers are fine. The wrong material could damage the microwave or even cause a fire.
Oven, stovetop, and toaster oven. Before you turn on the stove or oven, check first with an adult. He or she can show you the proper way to use the range and explain the different settings. When you are cooking something on the stove, always stay in the kitchen!
* Always use oven mitts when handling hot pans and baking trays.
* When you open the oven, avoid the blast of heat that will rise up in your face.
* Turn pan handles to the side so the pans don't accidentally get knocked off the stove.
* Switch off the stovetop or oven when you have finished cooking.
LESSON #7
SERVE UP SOME SPECIAL TREATS
When your fresh-baked goods are ready to serve, your friends and family will be happy to enjoy them. Here are some ways to make the most of your treats.
Eat them fresh. Most of the foods made from recipes in this book taste best the day they're made. But a few, like Monkey Munch Banana Bread and Zombie Zucchini Bread, actually taste better a day later. Check the recipe for serving and storage suggestions.
Pack 'em up. Store your baked goods in sealable containers or plastic bags. Most of the items can be stored at room temperature and will last a few days. You can also store unbaked piecrust and cookie, cracker, and bread dough in the freezer for up to 1 month.
Give a kitchen gift. Baked treats make great gifts for teachers, friends, and family members. Bring your parents and siblings a basket of breakfast breads in bed on their birthdays or special days. Wrap up cookies or homemade breads for teachers and friends. Use the fun labels and gift tags at the back of the book to make your goodies special.
Celebrate with sweets! Mark a big birthday or holiday with a special homemade cake or decorated cupcakes. See Bake Up Mix & Match Cookie Crafta Birthday Party! and Mix & Match Cupcake Decorating Party for some ideas. Make any celebration more fun with the stickers in the back of the book.
Make Special Holiday Treats. Bake up some holiday fun throughout the year. Make cookie hearts for Valentine's Day or reindeer for Christmas (Mix & Match Cookie Craft), Pumpkin Patch Muffins for Halloween, and cookies decorated like turkeys for Thanksgiving (Mix & Match Cookie Craft).
HOST A BAKE SALE!
Looking to raise money for your school or a charity? Host a bake sale. Follow these tips for successful sales. Check the fun extras at the back of the book to make your sale special.
Set up the sale. Cover your table with a tablecloth. Include a vase of flowers or other seasonal decoration.
Price it right. Include a sign with all the prices.
Make the food look yummy! Serve most of the cookies and bars in individually wrapped containers with handmade wrappers and stickers. You can decorate using the stickers and labels at the back of the book.
Include a recipe card. You can write down the recipe and give it away.
Advertise! Create a fun sign to post to spread the word.
CHAPTER 2
Good Morning Treats
Wake up to some toasty baked goodies for breakfast!
A Toast to You!
Mix & Match Toast Toppers Toaster-Oven Tarts Pumpkin Patch Muffins Bursting with Blueberries Muffins Carrot Applesauce Bites Fancy French Breakfast Treats Cranberry Orange Scones
A Toast to You!
Makes 1 serving
Here's a simple trick for making personalized toast. All you need is a piece of bread and a piece of foil. When your toast is ready, spread on a little butter and serve it up for a fun breakfast!
HERE'S WHAT YOU NEED
* 1 piece of bread
• Aluminum foil
• Toaster oven
HERE'S WHAT YOU DO
1. Roll a piece of foil into a letter or shape a little smaller than the piece of bread. Try the first initial of your name or a heart.
2. Place the letter on the bread. Turn your toaster oven on to the "toast" setting. Place the bread on the toaster rack, and toast until brown.
3. Remove the toast and the foil, and voilà!
SPREAD THE LOVE!
Jazz up your homemade toasts, muffins, and breads with flavored butter or cream cheese. Start with 2 tablespoons softened cream cheese or butter and add 1 to 2 teaspoons of the fillings listed here. Stir 'em up and spread 'em on thick!
(Continues…)
Excerpted from "Baking Class"
by .
Copyright © 2017 Deanna F. Cook.
Excerpted by permission of Storey Publishing.
All rights reserved. No part of this excerpt may be reproduced or reprinted without permission in writing from the publisher.
Excerpts are provided by Dial-A-Book Inc. solely for the personal use of visitors to this web site.
Table of Contents
Chapter 1: Welcome to Baking Class!Lesson 1: Bake Like a Pro!
Lesson 2: Gather Up the Right Tools
Lesson 3: Stock Up on Bakery Basics
Lesson 4: Baking Vocabulary
Lesson 5: Measure Carefully
Lesson 6: Kitchen Safety
Lesson 7: Serve Up Some Special Treats
Chapter 2: Good Morning Treats
A Toast to You!
Mix & Match Toast Toppers
Toaster-Oven Tarts
Pumpkin Patch Muffins
Bursting with Blueberries Muffins
Carrot Applesauce Bites
Fancy French Breakfast Treats
Cranberry Orange Scones
Chapter 3: Crackers & Quick Breads
Crunchy Tortilla Chips & Nachos
Quick Croutons
Puffy Popovers
Crispy Cheese Squares
Buttery Biscuits!
Silly Sticks
Crackin' Corn Bread
Mix & Match Under the Sea World
Monkey Munch Banana Bread
Zombie Zucchini Bread
Chapter 4: The Bread Bakery
Garlic Bread Sticks
Easy-Peasy Bread Dough
Simple Sandwich Loaf
Braid Away Bread
Sweet Cinnamon Rolls
Mix & Match Bread Art
No Need to Knead Bread
It's a Party! Pizza Dough
Chapter 5: The Cookie Jar
Chocolate Chip Cookie Factory
Awesome Oatmeal Cookies
Sweet & Simple Sugar Cookies
Mix & Match Cookie Craft
Snickerdoodles
Crispy Gingersnaps
Coconut Macaroons
Brownie Magic
Lots of Lemon Squares
Chapter 6: Save Room for Pie!
Dig in the Dirt Pie
Farmers' Market Fruit Tarts
Perfect Piecrust
Mix & Match Piecrust Shapes
My First Blueberry Pie
Teeny Tiny Apple Pies
Peachy Keen Crumble
Go Bananas Cream Pie
Chapter 7: Cake & Cupcake Factory
Cocoa Cake-in-a-Mug
Very Vanilla Birthday Cake
Buttercream Frosting
One-Bowl Chocolate Cupcakes
Mix & Match Cupcake Decorating Party
Say "Cheese!" Cake
After-School Apple Cake
Mini Strawberry Shortcakes
Index
Related Subjects
Customer Reviews
Explore More Items
")


")
")
")
")
")


")

